

To remove blank rows in Excel safely, add a helper column with =COUNTA(A2:F2) across your data range, filter that column to 0, and delete the rows that show. The popular Go To Special method is faster but riskier: it selects blank cells, so deleting entire rows removes every row containing any empty cell — including records that are merely missing one field.
Why the popular method is dangerous
Search this question and nearly every answer gives the same recipe: select your data, press F5, click Special, choose Blanks, then Delete › Entire Row.
It’s fast, and on some data it’s correct. On most real data it quietly destroys records.
Go To Special selects blank cells, not blank rows. If one customer is missing a phone number, that single empty cell gets selected. Delete › Entire Row then removes that customer entirely — name, email, order history, all of it — because one field was empty.
On a table where every row has at least one gap, Go To Special will delete every row you have. It does exactly what you asked; it just isn’t what you meant.
The method is safe only when your rows are either completely full or completely empty. That’s a real situation — some exports look like that — but it’s worth confirming rather than assuming.
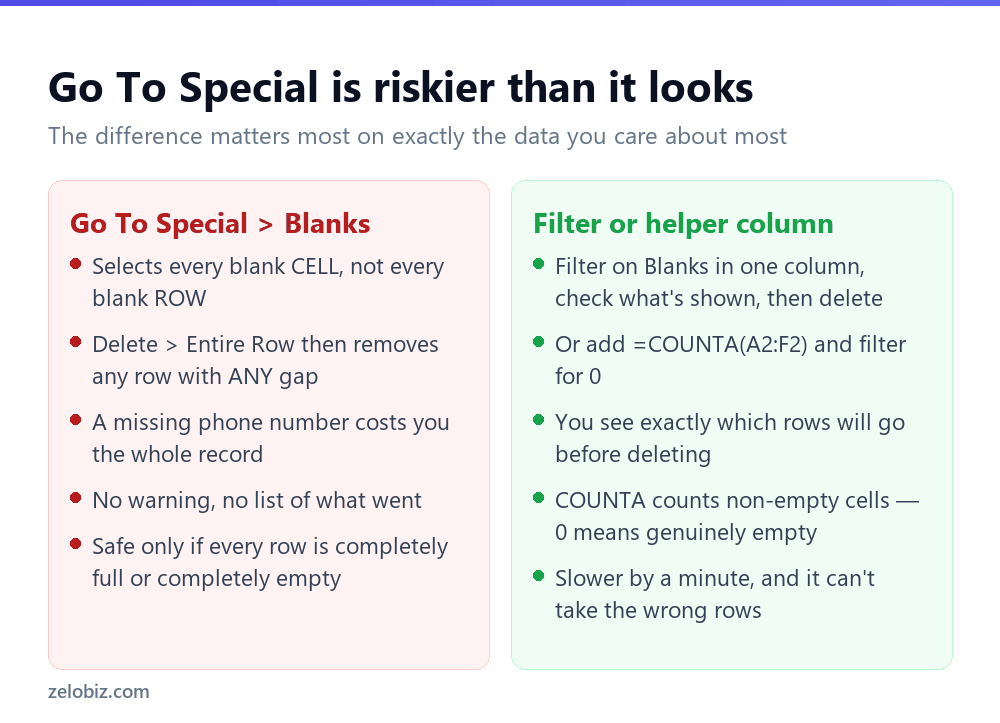
The method that can’t take the wrong rows
A helper column costs an extra minute and shows you precisely what will be deleted before anything happens.

COUNTA counts cells that contain anything — text, numbers, formulas, even a single space. So =COUNTA(A2:F2) returns 0 only when every cell across that row is genuinely empty. That’s exactly the test you want.
Filter the helper column to 0 and you’re looking at the rows that will go. Scroll through, confirm they’re all rubbish, then select and delete. Nothing is guesswork.
💡 Pro tip: Sorting on the helper column instead of filtering brings every blank row together at one end, which makes them a single contiguous block to select and delete. Add an index column first if the original order matters.
When Go To Special is fine
Not an argument against it entirely — it’s genuinely the fastest option when it applies.
Use it when you’ve checked that your data has no partially-filled rows, or when you’re working with a single column rather than a table. On one column, blank cells and blank rows are the same thing and there’s no risk.
The sequence: select the range, press F5, click Special, choose Blanks, then Home › Delete › Delete Sheet Rows. Just confirm what you’re selecting before the delete step — the selected cells are highlighted, so a quick scroll tells you whether they’re whole rows or scattered gaps.
Rows that look blank and aren’t
The other half of the problem: rows that appear empty, resist every removal method, and turn out to contain something invisible.

A single space is the usual culprit, common in exported data. The cell looks empty, COUNTA counts it as full, and Go To Special skips it. Select the range and run Find and Replace: find a single space, replace with nothing, Replace All — though note this also strips spaces from inside real text, so use it on a column of codes rather than on sentences.
Formulas returning empty text are the subtler one. A formula like =IF(A2>10,"Yes","") produces a cell that displays nothing but contains a formula. Excel counts it as occupied, and correctly — there is something there. If you need those treated as blank, convert the column to values first with Copy › Paste Special › Values.
To test whether a range is truly empty, use =COUNTBLANK(A2:F2) alongside COUNTA. If COUNTBLANK says 6 and COUNTA says 0 across six columns, the row is genuinely empty. If they disagree, something invisible is in there.
Blank rows at the bottom of the file
A different symptom: the file is enormous, the scrollbar suggests thousands of rows, and Ctrl+End jumps to row 40,000 when your data stops at 300.
Those rows aren’t blank in Excel’s view — they’ve been touched at some point, usually by formatting applied to whole columns, and Excel is storing them. Deleting the contents doesn’t help because there are no contents.
Select from the first genuinely empty row all the way down to the bottom of the sheet — click the row number, then Ctrl+Shift+Down — and right-click Delete. Then save and reopen the file. The used range only recalculates on save, so Ctrl+End will still point at row 40,000 until you do.
⚠️ Watch out: This is worth doing on any workbook that has become slow for no obvious reason. A phantom used range of a million rows makes every calculation, scroll and save slower, and it’s invisible until you press Ctrl+End.
Blank rows that were put there deliberately
Before removing anything, consider why the gaps exist. Blank rows are sometimes structural rather than accidental.
People use them to separate sections of a report, to mark where one month’s entries end, or to leave space for additions. Strip those out and the sheet becomes harder to read for whoever built it, even though it becomes easier for Excel to work with.
The compromise is to keep the visual separation without the empty rows: give the first row of each section a top border and a bold label. It groups things just as clearly and sorting, filtering and pivots all keep working, which blank separator rows quietly break.
Removing blank columns as well
The same problem sideways, and rarer but harder because Excel offers less help.
There’s no built-in Remove Blank Columns. The manual approach is a helper row above your data with =COUNTA(A2:A500) filled across, which counts entries in each column. Any column returning 0 is empty.
Then select those columns by holding Ctrl and clicking each heading, and delete them together. For anything recurring, Power Query has Remove Columns › Remove Blank Columns as a single command, which is another reason to load repeat imports through it.
Removing blank rows with Power Query
If you clean the same export every week, a repeatable process beats doing it by hand.
Select your data, Data › From Table/Range, then in the Power Query editor use Home › Remove Rows › Remove Blank Rows. Click Close & Load and you get a clean table on a new sheet.
Power Query’s definition of blank is stricter than Excel’s — it treats null and empty string as blank, which handles the formula case above without extra work. And next month, paste the new export over the source and hit Refresh; the same cleaning runs automatically.
Keeping the original order
Any method involving sorting will reorder your data, and if the original sequence carried meaning — chronological entries, a manual priority order — that’s lost.
Add an index column before you start: type 1 and 2 in the first two cells, select both, and drag the fill handle down. After removing the blanks, sort on that column to restore the original sequence, then delete it.
Filtering rather than sorting avoids the problem entirely, which is another reason the helper-column-and-filter method is the safer default.
- ✓Use a COUNTA helper column and filter to 0
- ✓Check what’s selected before any delete
- ✓Test with COUNTBLANK when rows look empty but resist removal
- ✓Save and reopen after deleting phantom rows at the bottom
- ✓Add an index column if the original order matters
- ✕Using Go To Special > Blanks on a table with partial rows
- ✕Assuming a cell that displays nothing is empty
- ✕Deleting rows without scrolling through the selection first
- ✕Expecting Ctrl+End to update before you save and reopen
- ✕Hand-cleaning the same export every month instead of using Power Query
Frequently asked questions
How do I delete all blank rows in Excel at once?
Add a helper column with =COUNTA(A2:F2) across your data, filter it to 0, then select and delete the visible rows. That removes only genuinely empty rows.
Why does Go To Special delete rows that have data?
Because it selects blank cells, not blank rows. Deleting entire rows then removes any row containing at least one empty cell, including records that are only missing a single field.
Why won’t Excel delete a row that looks blank?
It probably contains something invisible — a single space, a formula returning empty text, or a non-breaking space from a web paste. Use =COUNTBLANK() to test, and convert formulas to values if needed.
Why is my Excel file huge with only a few rows of data?
The used range extends far past your data, usually because formatting was applied to whole columns. Delete the empty rows below your data, then save and reopen — the used range only recalculates on save.
How do I remove blank rows without sorting my data?
Filter rather than sort. Add a COUNTA helper column, filter it to 0, delete the visible rows and clear the filter. Filtering leaves the remaining rows in their original order.
Can I remove blank rows automatically each time?
Yes, with Power Query. Load the data via Data, From Table/Range, use Home, Remove Rows, Remove Blank Rows, then Close & Load. Refresh re-runs the cleaning on new data.
- →Blank rows also break sorting — how to sort in Excel
- →Clean duplicates while you’re here: how to remove duplicates in Excel
- →Split imported data properly — how to split cells in Excel
- →Keep headers visible as you scan: how to freeze rows in Excel