
To burn a CD on Windows, insert a blank CD-R, and use Windows Media Player’s Burn tab for an Audio CD that will play in any standard CD player, including a car stereo — drag songs into the burn list and click Start Burn. For burning data files (not music meant to play as audio), use File Explorer’s built-in disc-burning option instead, choosing Mastered format for the widest compatibility. Most modern laptops don’t have a built-in disc drive at all — confirm yours does, or that you have an external USB burner, before starting.
The Confusion Every Guide Assumes You’ll Sort Out Yourself
Guides to burning a CD on Windows almost universally say “just open Windows Media Player” and leave it there. What they don’t say is that Windows 11 ships two different apps that both go by the name “Media Player,” and only one of them can burn anything.
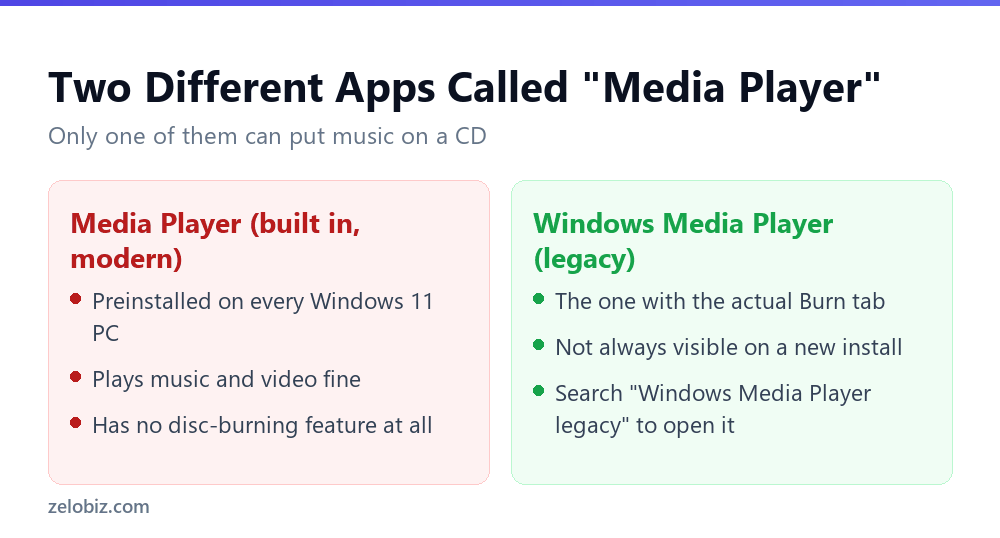
To get to the one you need, click Start and type Windows Media Player legacy into search. On most Windows 11 installs it’s still there, just not surfaced anywhere in the normal Start menu tiles, since Microsoft has been steering people toward the newer app for regular playback. If it isn’t installed, which happens on some newer or heavily customised setups, it can usually be added back through Settings > Apps > Optional features, searching for “Windows Media Player” in the list of optional features to add.
⚠️ Watch out: If the optional feature isn’t offered at all, that’s a sign the burn feature has been fully removed on that specific Windows build or edition. At that point, the File Explorer method covered below for data discs still works, or a lightweight third-party burner is the more reliable route for audio CDs specifically.
The one choice that matters most: disc format
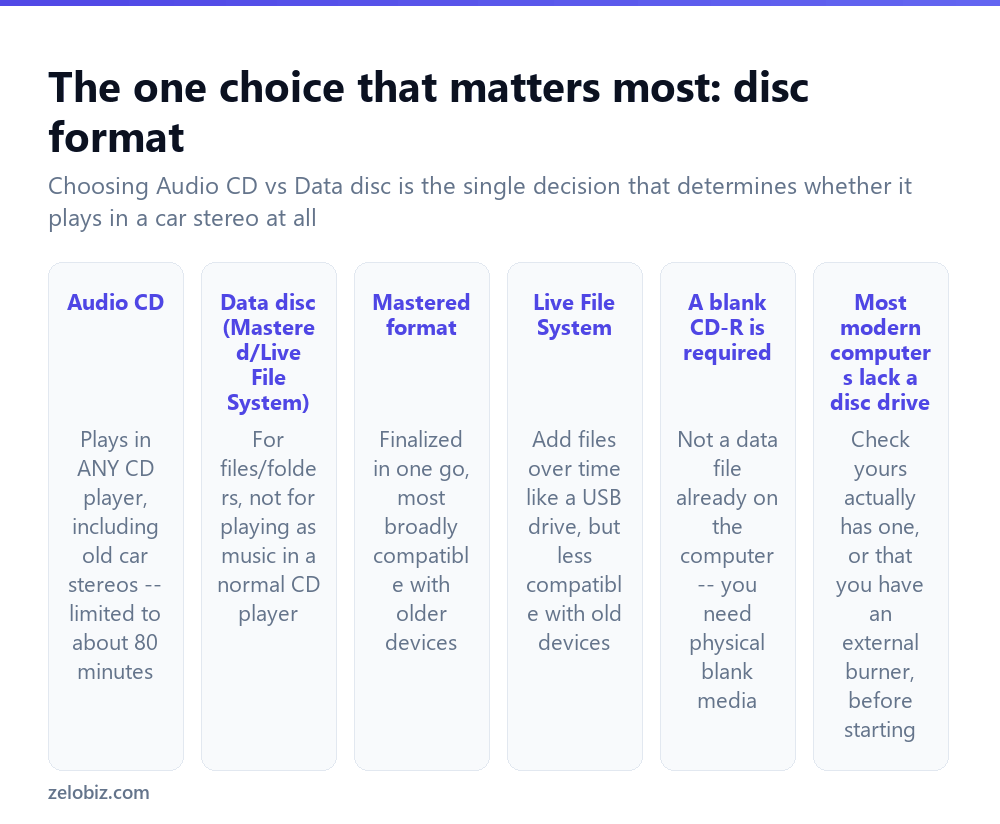
Audio CD — the format needed if the disc should play as music in any CD player, including an older car stereo, a standalone CD player, or any device that isn’t a computer. This format is limited to roughly 80 minutes of audio total, regardless of file size, since it’s measured in playback time rather than data size.
Data disc — for burning files and folders (documents, photos, or even MP3 files stored as data rather than audio tracks) the way you’d copy them to a USB drive. A data disc holding MP3 files will not play in a standard CD player expecting audio tracks — it needs a device specifically capable of reading MP3 files from a data disc, which many older or simpler CD players cannot do.
Within data discs, Mastered format finalizes everything in one burning session and is the most broadly compatible choice, especially for anything that might be read by an older device. Live File System format allows adding files gradually over time, similar to a USB drive, but is less universally compatible, particularly with older hardware and some non-Windows systems.
Getting the format choice wrong is the single most common reason a burned CD doesn’t work as expected — a data disc full of MP3 files put into a car stereo expecting an audio CD will often play nothing at all, or only partially, depending on that specific stereo’s actual capabilities.
Burning an audio CD on Windows
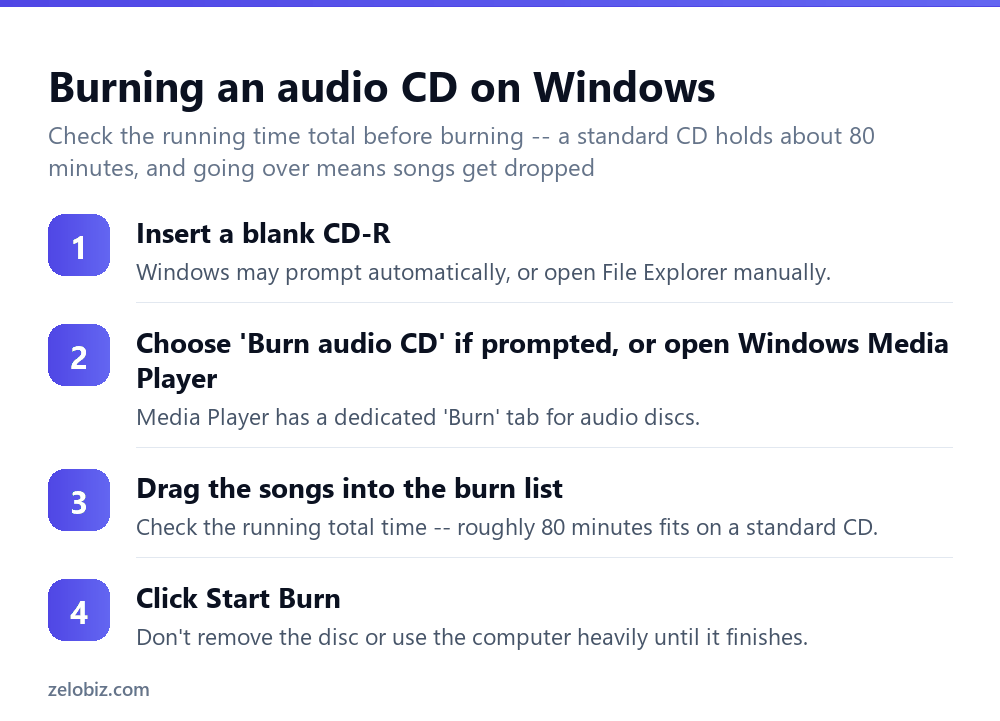
Insert a blank CD-R into the disc drive. Windows may prompt automatically asking what to do with it, or open Windows Media Player manually if it doesn’t.
In Windows Media Player, find the Burn tab (typically on the right side of the window).
Drag the songs you want onto the burn list. Media Player shows a running total time for the list — keep it under roughly 80 minutes, since going over means some songs simply won’t fit and will be dropped from the burn.
Click Start Burn. Avoid removing the disc or putting the computer under heavy simultaneous use while burning is in progress, since interrupting the process partway through typically ruins that disc.
Burning a data disc on Windows
Insert a blank disc, open File Explorer, and if prompted, choose how to use the disc — select Mastered format for the widest compatibility unless there’s a specific reason to use Live File System instead.
Drag the files or folders you want onto the disc in File Explorer, exactly like copying to any other drive.
Once everything needed is added, use the “Finish burning” or “Close session” option (the exact wording varies slightly by Windows version) to finalize the disc — this step is required for a Mastered-format disc to actually become readable in other devices, not just the computer that created it.
If your computer doesn’t have a disc drive
Most modern laptops, and many modern desktops, no longer include a built-in CD/DVD drive at all — this has been the general trend for over a decade as physical media use has declined. Check your specific computer’s specifications, or look for a disc slot directly on the machine, before assuming a burn should be possible. An inexpensive external USB CD/DVD burner works as a straightforward substitute if the computer itself lacks one, and functions identically to a built-in drive for the burning process described above.
Most plug in over USB and need no separate driver installation on a current version of Windows, showing up in File Explorer exactly like a built-in drive would the moment it’s connected.
Burning a disc image (.iso) instead of loose files
Neither the audio CD steps nor the data disc steps above cover a third, common case: a downloaded .iso file, the kind used for reinstalling an operating system or distributing software as a single disc image. An ISO isn’t a file to copy onto a disc, it’s a complete snapshot of one, and copying it as a regular file produces a disc containing one giant file that won’t boot or install anything.
Windows has handled this natively for years. Right-click the .iso file in File Explorer and choose Burn disc image. A small window opens showing the disc burner selected and the image file to be written, and clicking Burn writes the disc’s actual contents rather than the ISO file itself. That’s the whole process from start to finish, and no third-party burning software is required for it.
If “Burn disc image” doesn’t appear in the right-click menu, the file may be associated with a different program that claims .iso files by default, such as a virtual drive tool or a compression utility. Right-click, choose Open with, then Windows Disc Image Burner from the list to force it, or set that as the default afterward if this comes up often.
A worked example: burning a mix CD for a car without Bluetooth
Say an older car’s stereo only reads CDs, no Bluetooth or USB support, and you want to burn a mix of songs from your computer to play on a road trip.
This is squarely an Audio CD job, not a data disc — open Windows Media Player, go to the Burn tab, and drag the chosen songs into the burn list one at a time, watching the running total time shown at the bottom. If the selection comes in under about 80 minutes, everything fits on one disc; if it’s over, remove a few songs or plan for a second disc rather than letting Media Player silently drop whichever songs don’t fit.
Before committing to the full burn, it’s worth testing the process with a short three-or-four-song selection on a spare blank disc first if this is the first time burning an audio CD on that specific computer — confirming the process completes successfully and the resulting disc actually plays back correctly in the target car stereo, before investing a full 80-minute selection and a full blank disc into a burn that might reveal a problem only at the very end.
Label the finished disc directly (a permanent marker on the top, non-recording side) with something identifying its contents, since a stack of unlabeled burned CDs becomes hard to tell apart after a few have accumulated.
Burning on a Mac
Modern Macs generally lack a built-in disc drive entirely, the same trend affecting most modern laptops — an external USB CD/DVD burner is required either way. Once connected, macOS’s Finder can burn a data disc directly (drag files onto a blank disc’s icon, then click Burn), while burning a proper Audio CD on a Mac is best done through iTunes or Music app’s own playlist-burning feature, which specifically produces the audio track format a standard CD player expects, the same distinction that matters on Windows.
Whichever platform is being used, the underlying distinction between Audio CD and data disc formats stays exactly the same, and it’s the one thing worth getting right before anything else about the burn process itself.
When something’s not working
No disc drive present — check whether your specific computer has one at all before troubleshooting further; an external USB burner solves this directly if it doesn’t.
Burned as a data disc but need it to play in a car stereo — redo the burn specifically as an Audio CD through Windows Media Player’s Burn tab, not as a data disc.
The burn failed partway through — try a fresh blank disc; a used, previously-failed, or physically damaged disc can cause a burn to fail partway even when the process itself was started correctly.
Some songs got cut off or dropped — the total running time exceeded the disc’s roughly 80-minute audio capacity; trim the playlist to fit within that limit.
The disc plays in the computer but not in a standalone player — older or cheaper standalone CD players can be genuinely pickier about which specific CD-R brand or type they’ll read reliably; trying a different brand of blank disc sometimes resolves this.
- ✓Choose Audio CD format specifically if the disc needs to play in a standard CD player
- ✓Check the total running time stays under about 80 minutes for an audio CD
- ✓Use Mastered format for a data disc needing the widest device compatibility
- ✓Confirm your computer has a disc drive, or use an external USB burner, before starting
- ✓Try a different blank disc brand if a standalone player won’t read a computer-verified disc
- ✕Burning a data disc of MP3s and expecting it to play in a standard car stereo
- ✕Exceeding roughly 80 minutes on an audio CD and having songs silently dropped
- ✕Assuming every modern computer still has a built-in disc drive
- ✕Removing a disc or heavily using the computer while a burn is actively in progress
- ✕Assuming a failed burn means the software is broken rather than trying a fresh blank disc
Worked example: what to try when Windows Media Player is nowhere to be found
Someone sets up a brand new Windows 11 laptop, wants to burn a disc for the first time on it, searches for Windows Media Player, and gets nothing back. Here’s the order worth trying before concluding the PC simply can’t do this.
If step 2 lists the feature but it’s unchecked, ticking it and clicking OK installs it in the background, usually inside a minute or two on a normal connection, after which the search in step 1 finds it. If Windows doesn’t offer it as an optional feature at all, that specific edition or build has dropped it entirely rather than just hidden it, and no amount of searching brings it back.
A free third-party burner fills that gap for audio CDs specifically, since File Explorer’s own disc-burning tool, covered below for data discs, doesn’t create the proper audio CD format a standalone car stereo or CD player expects. It writes data discs fine; audio is the part it can’t do.
Once a working burner is open, the workflow is the same regardless of which one it is: build a playlist of the songs in the order you want them, keep the total under about 80 minutes, and start the burn without interrupting it. The tool doing the burning matters less than making sure it’s actually the kind of tool built for audio CDs in the first place.
Frequently asked questions
Why can’t I find Windows Media Player on my Windows 11 PC?
Windows 11 comes with a newer app simply called “Media Player,” which has no burning feature. The older Windows Media Player, the one with the Burn tab, is usually still available by searching “Windows Media Player legacy,” or can be added under Settings, Apps, Optional features.
How do I burn an audio CD on Windows?
Insert a blank CD-R, open Windows Media Player’s Burn tab, drag songs into the burn list, and click Start Burn.
What’s the difference between an Audio CD and a data disc?
An Audio CD plays in any standard CD player, including a car stereo, limited to about 80 minutes. A data disc holds files like documents or MP3s but won’t play as music in most standard CD players.
Why won’t my burned CD play in my car stereo?
It was likely burned as a data disc rather than an Audio CD. Redo the burn specifically choosing Audio CD format instead.
What if my computer doesn’t have a CD drive?
Most modern laptops don’t include one. An inexpensive external USB CD/DVD burner works as a direct substitute.
How much music fits on one CD?
About 80 minutes of audio on a standard Audio CD, regardless of the individual file sizes involved.
Why did my burn fail partway through?
Try a fresh blank disc — a used, previously failed, or damaged disc commonly causes a burn to fail mid-process.
- →Compress files before archiving them elsewhere: how to zip a file
- →Digitize documents instead of burning discs: how to scan a document
- →Recover a file if a burn goes wrong: how to recover deleted files
- →Prepare images for a project: how to resize an image