
To resize an image on a Mac, open it in Preview and use Tools › Adjust Size, entering a new width or height with Scale proportionally checked to avoid distortion. On Windows, open the image in the Photos app and use the Resize option from the menu. The single most important setting on either platform is keeping the aspect ratio locked — unlocking it lets width and height change independently, stretching or squashing the image out of its correct proportions.
Built-in resizing, by platform
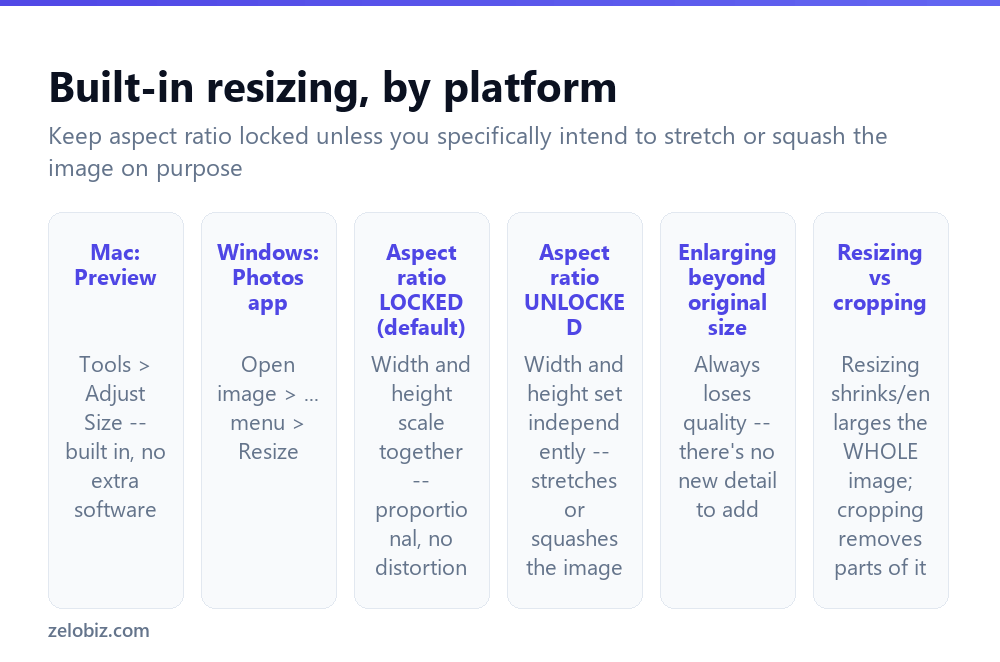
Mac: Preview — open the image, Tools › Adjust Size, and enter a new width or height. Built in, free, no other software needed.
Windows: Photos app — open the image, find the Resize option (in the “…” more-options menu, or directly available depending on Windows version), and enter new dimensions.
Aspect ratio locked (the default in most tools) — width and height scale together, proportionally, so the image keeps its correct shape at the new size. Changing one dimension automatically adjusts the other to match.
Aspect ratio unlocked — width and height can be set independently, which stretches or squashes the image if the new proportions don’t match the original. This is occasionally done intentionally (fitting an image into an unusually-shaped space), but is far more often an accidental mistake that produces a visibly distorted result.
Resizing and cropping are genuinely different operations, worth not confusing. Resizing shrinks or enlarges the entire image while keeping all of its original content. Cropping removes parts of the image entirely, keeping only a selected region at its original detail level.
Resizing on a Mac with Preview
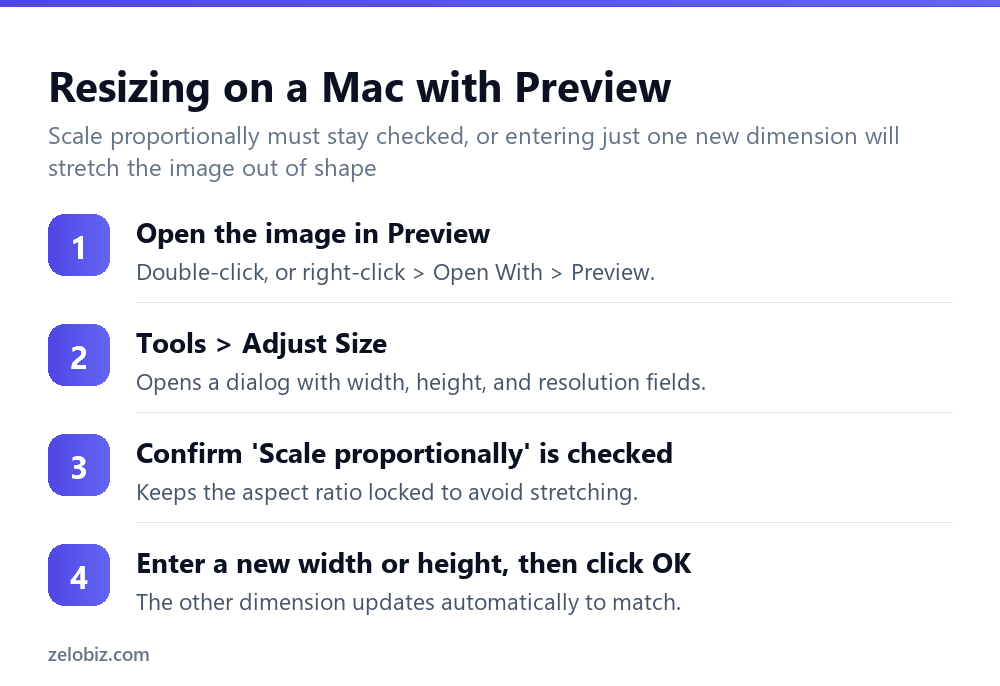
Open the image in Preview — double-click, or right-click and choose Open With › Preview.
Tools › Adjust Size opens a dialog with width, height, and resolution fields.
Confirm “Scale proportionally” is checked — this is what keeps the aspect ratio locked so entering a new width automatically adjusts the height to match, and vice versa, avoiding any stretching.
Enter the new width or height (in pixels, inches, or another unit, selectable from a dropdown), then click OK. Save the file afterward — ideally with Save As to a new filename, preserving the original at its full original size in case it’s needed again later.
Resizing on Windows
Open the image in the Photos app, and look for the Resize option, typically accessible from a menu of additional options (often represented by three dots, “…”) near the top of the window.
Enter the desired new dimensions — most versions offer both preset common sizes and a custom option for an exact width and height, with a checkbox to maintain the original aspect ratio, which should generally stay checked unless intentional distortion is the goal.
Save the resized version, again ideally as a new file rather than overwriting the original.
Enlarging vs shrinking — a genuinely different situation
Shrinking an image (making it smaller than its original size) loses no meaningful quality in most cases — there’s more detail in the original than the smaller size needs, so nothing important is lost in the reduction.
Enlarging an image beyond its original size is fundamentally different and always involves some quality loss — there’s no genuine additional detail to add, so the software has to invent or interpolate new pixels to fill the larger space, which reliably produces some degree of blurriness or visible pixelation, worse the more the image is enlarged beyond its native size.
💡 Pro tip: If you need an image larger than its current resolution genuinely allows for a clean result, the better fix is finding or recapturing a higher-resolution original, not trying to enlarge the existing smaller one — no resizing tool, no matter how sophisticated, can add detail that was never actually captured in the first place.
Resizing for a specific purpose
Different destinations call for different target sizes — a social media profile photo, an email attachment, or a printed photo each have different practical size requirements. For an exact pixel size (a profile photo requiring precisely 400×400 pixels, for instance), enter the exact width and height numbers directly rather than a percentage, which only guarantees a proportional change relative to the current size, not an exact final dimension.
A worked example: preparing a photo for a website
Say a photo straight from a modern phone camera is 4000×3000 pixels, and a website needs it at no more than 1200 pixels wide to avoid slowing down the page for visitors.
Open it in Preview, Tools, Adjust Size, and with Scale proportionally checked, type 1200 into the width field — the height field updates automatically to 900, preserving the original 4:3 proportions exactly, rather than needing to calculate that number by hand.
Save the result as a new file rather than overwriting the 4000×3000 original — the full-resolution version stays useful for anything needing a larger size later (print, a different use), while the resized 1200-pixel version is what actually gets uploaded to the website.
If the resulting file size is still larger than ideal for a web page despite the smaller dimensions, that’s a separate compression step, not a resizing one — most export dialogs offer a quality/compression slider alongside the dimension fields, worth adjusting downward for web use where file size matters more than for a printed photo.
Batch resizing multiple images at once
For resizing many images the same way — an entire folder of product photos all needing the same target width, for instance — doing each one individually through Preview or Photos becomes tedious fast. On a Mac, Automator can build a simple batch-resize action (a Quick Action, right-clickable directly from Finder) that applies the same resize to every selected image in one step. On Windows, several free batch image tools offer equivalent functionality, resizing an entire selected folder to a specified dimension in one pass rather than requiring the Photos app’s one-at-a-time workflow repeated many times over.
Resizing for print vs resizing for screen
It’s worth knowing these have somewhat different practical concerns. For screen use (a website, an email, a social media post), pixel dimensions are what matters — a specific width and height in pixels, independent of any physical print size.
For print, both pixel dimensions and the image’s resolution (measured in DPI, dots per inch) matter together, since they combine to determine the actual physical size and sharpness of the printed result. An image resized purely by pixel count without considering its resolution setting can print at an unexpected physical size, or look softer than intended, even though it displays perfectly fine on a screen the whole time.
When something comes out wrong
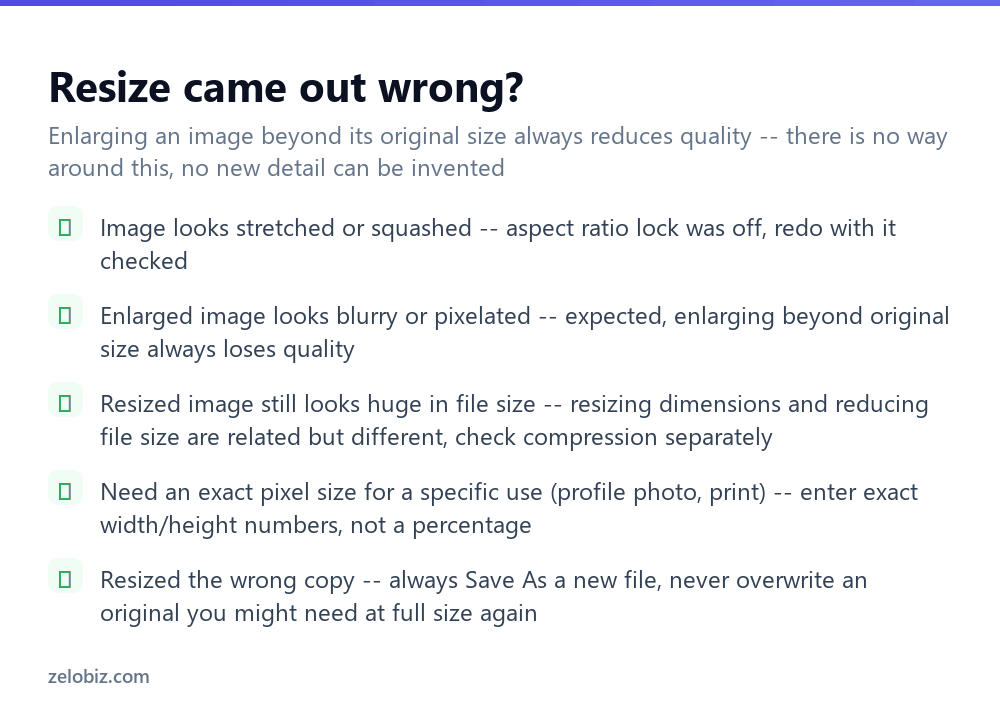
The image looks stretched or squashed — the aspect ratio lock was off during resizing. Redo it with “Scale proportionally” (Mac) or “maintain aspect ratio” (Windows) checked.
An enlarged image looks blurry or pixelated — this is expected and not a sign of doing anything wrong; enlarging beyond the original resolution always loses some quality, with no way around it using standard resizing tools.
The resized image’s file size is still large — resizing dimensions and reducing file size through compression are related but genuinely different operations; a physically smaller image can still have a large file size if compression wasn’t also applied, and vice versa.
The wrong copy got resized — always use Save As to create a new file rather than overwriting the original, preserving the full-size original for any future need.
- ✓Keep aspect ratio locked unless stretching is genuinely intentional
- ✓Use Save As to preserve the original at full size, not overwrite it
- ✓Enter exact pixel dimensions when a specific exact size is required
- ✓Expect some quality loss whenever enlarging beyond the original resolution
- ✓Find a higher-resolution original rather than trying to enlarge a small one cleanly
- ✕Unlocking aspect ratio by accident and stretching the image out of shape
- ✕Overwriting an original image you might need at full size again later
- ✕Using a percentage when an exact pixel dimension was actually required
- ✕Expecting an enlarged image to look as sharp as the original resolution did
- ✕Confusing resizing (shrinking/enlarging the whole image) with cropping (removing parts of it)
Frequently asked questions
How do I resize an image on a Mac?
Open it in Preview, use Tools, Adjust Size, and enter a new width or height with Scale proportionally checked to avoid distortion.
How do I resize an image on Windows?
Open it in the Photos app and use the Resize option, entering new dimensions with aspect ratio maintained.
Why does my resized image look stretched?
The aspect ratio lock was off during resizing, letting width and height change independently. Redo it with the lock enabled.
Why does an enlarged image look blurry?
Enlarging beyond the original resolution always loses some quality, since there’s no genuine new detail to add — this is expected, not an error.
What’s the difference between resizing and cropping an image?
Resizing shrinks or enlarges the whole image while keeping all its content. Cropping removes parts of the image, keeping only a selected region.
Does resizing an image also reduce its file size?
Not automatically. Resizing changes dimensions; reducing file size through compression is a related but separate step, often needed in addition to resizing.
- →Convert a resized image to PDF: how to convert JPG to PDF
- →Fix the format of an iPhone photo first: how to convert HEIC to JPG
- →Bundle several resized images together: how to zip a file
- →Scan a document instead of resizing a photo: how to scan a document