
To screenshot on Mac computers, press Cmd+Shift+3 for the entire screen, Cmd+Shift+4 to drag and select a specific area, or Cmd+Shift+4 then Spacebar to capture just one window by clicking it. Cmd+Shift+5 opens a toolbar with all these options plus screen recording and more control over where files save. By default, screenshots save as PNG files directly to the Desktop.
The four shortcuts, and what each actually captures
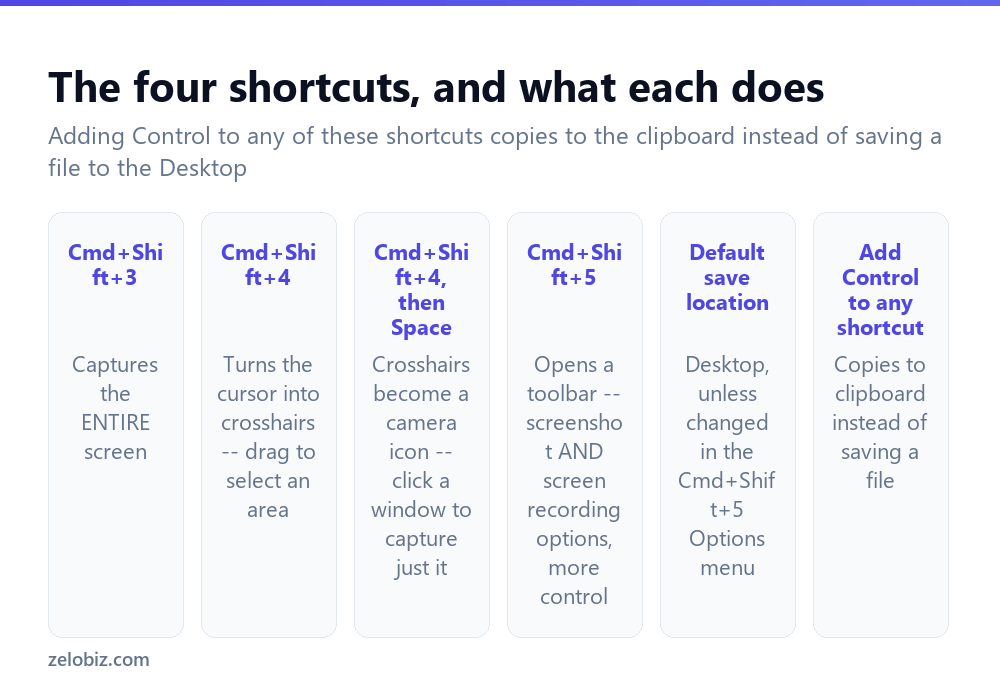
Cmd+Shift+3 — captures the entire screen immediately, no selection step. On a multi-monitor setup, this captures every connected display as separate files, one per screen.
Cmd+Shift+4 — turns the cursor into crosshairs; click and drag to select a specific rectangular area, releasing the mouse button to capture exactly that selection.
Cmd+Shift+4, then Spacebar — after pressing Cmd+Shift+4, tapping Space switches the crosshairs into a small camera icon; hovering over any open window highlights it, and clicking captures just that window cleanly, including a subtle drop shadow around its edges by default.
Cmd+Shift+5 — opens a persistent on-screen toolbar offering all of the above as clickable buttons, plus screen recording (both full-screen and selected-area video), a timer delay option, and direct access to change where captures save.
Add the Control key to any of these shortcuts (Cmd+Ctrl+Shift+3, for instance) to copy the screenshot directly to the clipboard instead of saving it as a file — useful for pasting straight into a document or message without a saved file cluttering the Desktop.
Capturing just one window
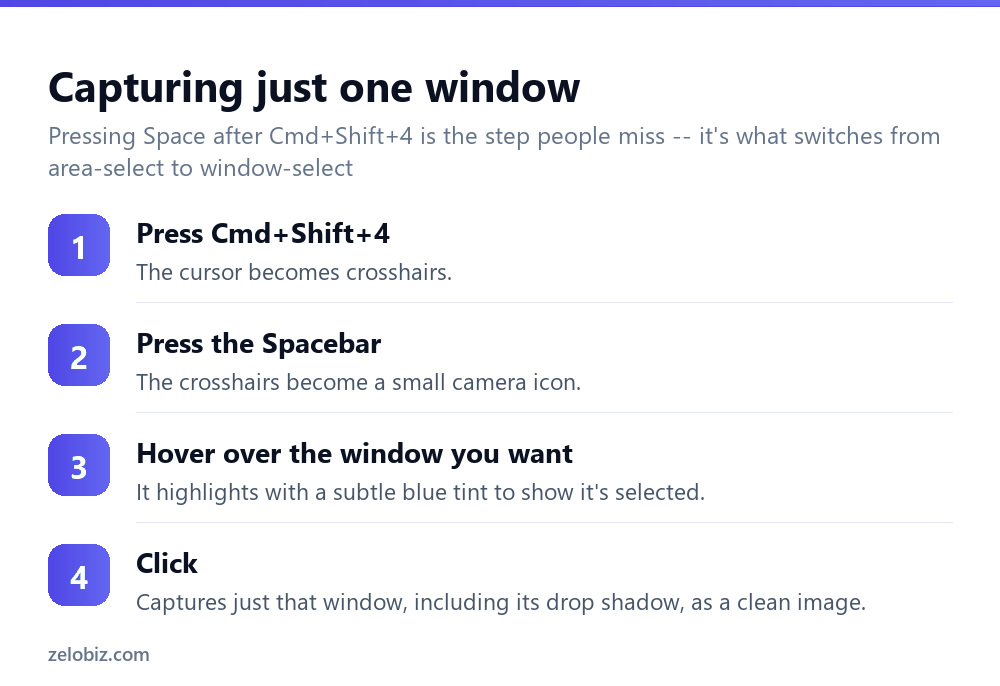
Press Cmd+Shift+4 — the cursor becomes crosshairs, ready for a drag-selection.
Press the Spacebar while those crosshairs are active — this is the step that’s easy to miss, and it’s what switches from area-selection mode into window-selection mode, changing the cursor to a small camera icon.
Hover over the specific window you want — it highlights with a subtle blue tint confirming it’s the one that will be captured.
Click. This captures just that window as a clean image, automatically cropped to its actual bounds rather than needing to manually drag a selection around it.
💡 Pro tip: Hold the Option key while clicking in this window-capture mode to skip the drop shadow that’s otherwise added around the captured window by default — useful when you want a perfectly clean rectangular image with no shadow effect.
Using the Cmd+Shift+5 toolbar for more control
This shortcut is worth learning even after the basic ones, since it exposes options the simpler shortcuts don’t. Beyond the same full-screen, selection, and window capture modes as buttons, it includes:
Screen recording — both full-screen and selected-area video capture, with the resulting video also saving to the same location as screenshots by default.
A timer delay (5 or 10 seconds under Options) — useful for capturing a menu, tooltip, or hover state that would otherwise close the instant you moved the mouse to trigger a keyboard shortcut.
Save location control — Options lets you change the default save destination from Desktop to Documents, Clipboard, Mail, Messages, Preview, or a custom folder, without needing to move files manually afterward.
Where screenshots actually save
By default, every screenshot saves as a PNG file directly to the Desktop, named with the date and time it was taken. If Desktop screenshots have been piling up and are hard to find among other files, either change the default location via the Cmd+Shift+5 Options menu, or simply search Spotlight for “Screen Shot” to find them regardless of how cluttered the Desktop has become.
Capturing the Touch Bar (older MacBook Pro models)
On MacBook Pro models with a physical Touch Bar, Cmd+Shift+6 captures just the Touch Bar’s current contents as a separate screenshot — a specific, less commonly known shortcut distinct from the four main ones above, relevant only to those particular Touch Bar-equipped models.
A worked example: documenting a software bug
Say an app is showing an error message and you need to send a clear screenshot to support, showing just the error dialog without the rest of your cluttered desktop visible in the background.
Press Cmd+Shift+4, then Spacebar to switch into window-capture mode, hover until the error dialog itself highlights (not the whole app window behind it, if the error is a separate floating dialog), and click. This captures just that dialog cleanly, with nothing else from the desktop visible, which is exactly what a support team needs to see without extra context to sort through.
If the error message is a hover tooltip or a menu that closes the instant you move the mouse toward a keyboard shortcut, switch to the Cmd+Shift+5 toolbar instead, click Options, set a 5-second timer, then trigger the error state and hold it in place while the timer counts down to the actual capture.
Add the Control key to the shortcut (Cmd+Ctrl+Shift+4, then Space) if you plan to paste the screenshot directly into an email or support chat rather than needing a saved file at all — this skips the file-saving step entirely and puts the image straight on the clipboard.
Screenshotting on an external display or multiple monitors
With more than one display connected, Cmd+Shift+3 captures every connected display as separate files, one screenshot per screen, rather than one combined image spanning both. If only one specific display’s content is needed, the selection shortcuts (Cmd+Shift+4, or Cmd+Shift+4 then Space for a window) work across displays exactly as on a single screen — simply drag the selection or click the window on whichever display it’s actually on.
Editing a screenshot immediately after capture
A small thumbnail preview appears briefly in the bottom-right corner of the screen immediately after most capture methods. Clicking that thumbnail before it disappears opens a quick markup view, letting you crop, annotate with shapes or text, or add a signature directly, without needing to open a separate image editor afterward.
This thumbnail preview times out and disappears after a few seconds if not clicked — the screenshot file itself still saves normally either way, so missing the preview window only means missing the chance for that immediate quick-edit step, not losing the screenshot.
Screenshotting a specific menu bar item or the whole menu bar
The same window-capture technique (Cmd+Shift+4, then Space) works on the menu bar itself and on open dropdown menus, treating them the same as any other on-screen element — hovering over an open menu and clicking captures just that menu cleanly. This is particularly useful combined with the Cmd+Shift+5 timer delay when the menu in question closes the instant a keyboard shortcut is pressed directly.
When something’s not working
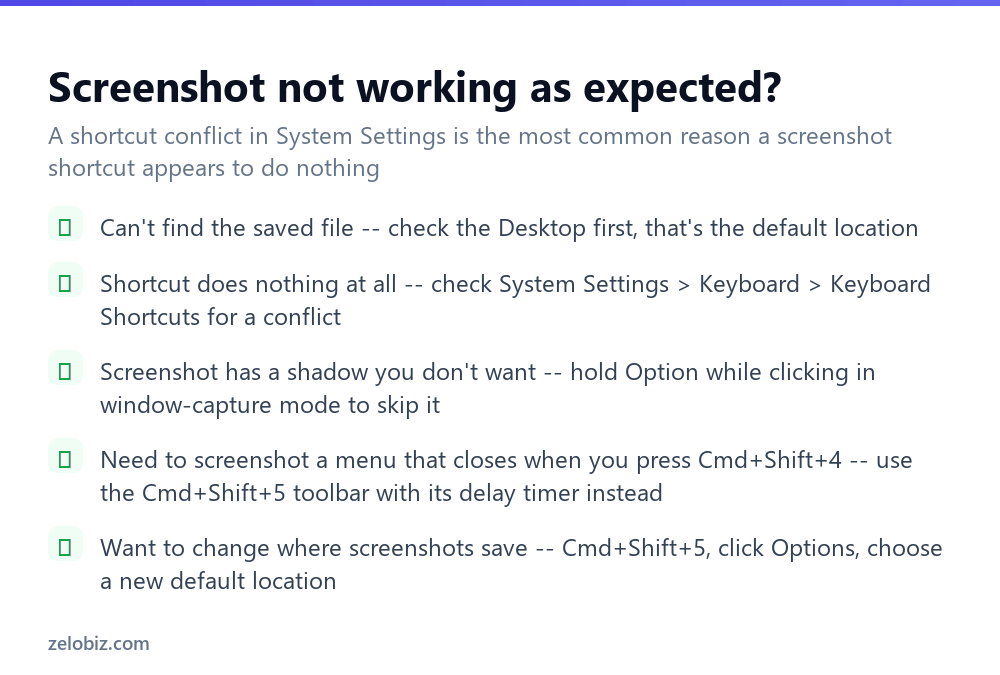
Can’t find the saved file — check the Desktop first, the default save location, or search Spotlight for “Screen Shot” if the Desktop has been changed or is too cluttered to spot it easily.
The shortcut does nothing at all — check System Settings › Keyboard › Keyboard Shortcuts › Screenshots for a conflict, or confirm the shortcut hasn’t been reassigned or disabled by another application that uses the same key combination.
An unwanted shadow appears around a window capture — hold Option while clicking during window-capture mode to skip it.
Need to capture something that closes when you try — a dropdown menu, a tooltip, a hover state — use the Cmd+Shift+5 toolbar’s timer delay option, giving a few seconds to set up the exact state you want captured before it actually fires.
- ✓Use Cmd+Shift+4 then Space specifically to capture just one clean window
- ✓Hold Option while clicking to skip the default drop shadow on a window capture
- ✓Use the Cmd+Shift+5 timer delay for menus or tooltips that close on their own
- ✓Add Control to any shortcut to copy directly to the clipboard instead of saving a file
- ✓Check System Settings Keyboard Shortcuts if a screenshot key combination stops responding
- ✕Forgetting the Spacebar step and manually dragging a selection around a window instead
- ✕Assuming a missing screenshot file was never actually saved rather than checking the Desktop first
- ✕Trying to capture a menu with a basic shortcut that closes the menu on keypress
- ✕Overlooking the Cmd+Shift+5 toolbar’s extra options like save location and timer delay
- ✕Assuming a non-responsive shortcut means something is broken rather than checking for a conflict
Frequently asked questions
What is the keyboard shortcut to screenshot on a Mac?
Cmd+Shift+3 for the whole screen, Cmd+Shift+4 to select an area, or Cmd+Shift+4 then Space to capture just one window.
Where do screenshots save on a Mac by default?
As PNG files directly to the Desktop, named with the date and time taken, unless the default location is changed via the Cmd+Shift+5 Options menu.
How do I screenshot just one window on a Mac?
Press Cmd+Shift+4, then tap Spacebar to switch to window-capture mode, then click the window you want to capture.
How do I copy a screenshot to the clipboard instead of saving a file on a Mac?
Add the Control key to any screenshot shortcut, such as Cmd+Ctrl+Shift+4, to copy it directly to the clipboard.
How do I remove the shadow from a window screenshot on a Mac?
Hold the Option key while clicking during window-capture mode (Cmd+Shift+4, then Space) to skip the default drop shadow.
What does Cmd+Shift+5 do on a Mac?
It opens a toolbar with all screenshot capture modes plus screen recording, a timer delay option, and control over where files are saved.
- →Connect your headphones first: how to connect AirPods to a laptop
- →Deal with a frozen app instead: how to force quit on Mac
- →Send a screenshot to another Apple device: how to AirDrop
- →Right-click for more screenshot-adjacent options: how to right click on a Mac