
To convert HEIC to JPG on a Mac, open the photo in Preview, go to File › Export, choose JPEG from the Format dropdown, and save — built in, no extra software needed. On Windows, install the free HEIF Image Extensions from the Microsoft Store first if photos won’t even open, then use Paint or Photos to open and re-save as JPG. Free online converters and batch tools work for converting many photos at once on either platform.
What HEIC actually is, and why this comes up
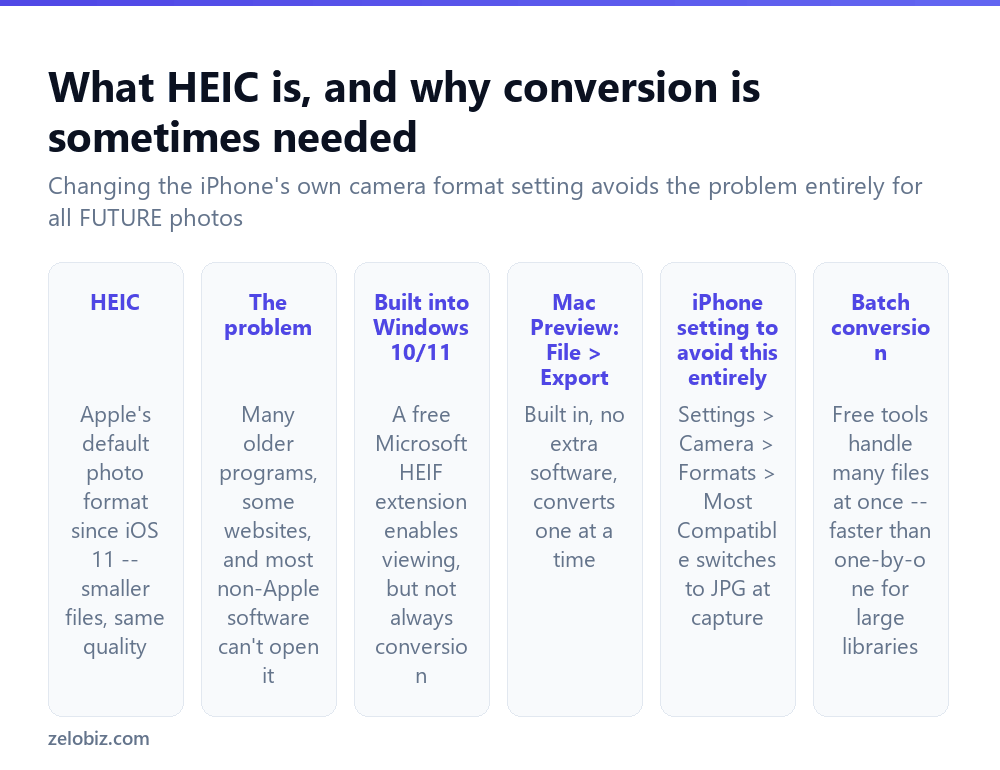
HEIC has been the iPhone’s default photo format since iOS 11, chosen because it produces meaningfully smaller files than JPG at equivalent visual quality — genuinely useful for saving storage space on the device and in iCloud.
The practical problem is compatibility: many older programs, some websites (particularly ones expecting a standard JPG or PNG upload), and most non-Apple software either can’t open HEIC files at all or handle them inconsistently. JPG, despite being an older and less efficient format, remains the far more universally supported choice across virtually all software and websites.
Windows 10 and 11 can view and sometimes convert HEIC files, but only after installing the free HEIF Image Extensions from the Microsoft Store — this isn’t built in by default the way it is on a Mac.
If HEIC compatibility keeps causing problems, the most effective long-term fix is changing the iPhone’s own camera setting rather than repeatedly converting photos after the fact — covered below.
Converting on a Mac (built in, free)
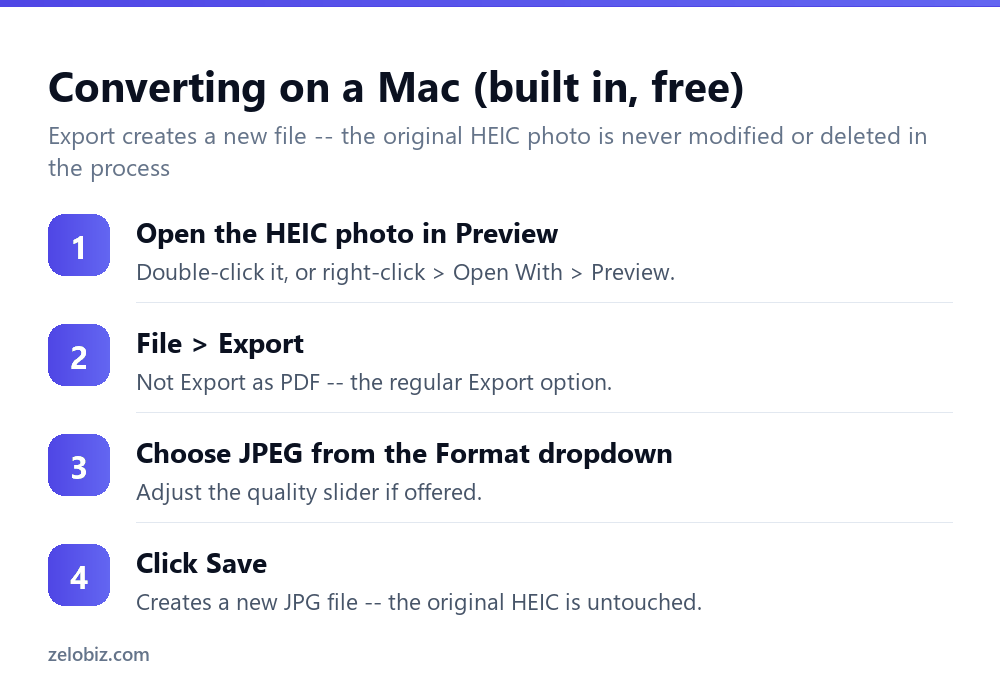
Open the HEIC photo in Preview — double-click it, or right-click and choose Open With › Preview if it opens in a different app by default.
File › Export — not “Export as PDF,” which is a different menu item entirely, easy to click by mistake since it sits nearby.
In the export dialog, choose JPEG from the Format dropdown, adjusting the quality slider if one is offered (higher quality means a larger resulting file, and vice versa).
Click Save. This creates a brand new JPG file at the chosen location — the original HEIC photo remains completely untouched, exactly where it was.
Converting on Windows
First, confirm the free HEIF Image Extensions (search for it directly in the Microsoft Store) is installed — without it, Windows can’t even open or preview a HEIC file, let alone convert one.
Once installed, open the HEIC photo in the Photos app or Paint, then use File › Save As (or the equivalent export option) and choose JPG or JPEG as the output format.
Alternatively, free online converters handle this without installing anything locally at all — upload the HEIC file, download the converted JPG. As with any online file tool, this means the file passes through a third-party server, so it’s worth avoiding for anything genuinely sensitive.
Converting many photos at once
For a handful of photos, converting one at a time through Preview or the Windows Photos app is perfectly practical. For a large batch — an entire photo library, or dozens of images from an event — a dedicated batch conversion tool saves real time over repeating the same manual export process individually for each file.
On a Mac, Automator can build a simple batch-conversion workflow (a Quick Action or standalone app) that converts an entire selected folder of HEIC files to JPG in one action, worth setting up once if this is a recurring need rather than a one-off task.
Avoiding the problem going forward
The most effective long-term fix, if HEIC compatibility keeps causing friction, is changing the setting at the source: iPhone Settings › Camera › Formats, and select Most Compatible instead of the default “High Efficiency” option.
This makes the iPhone’s camera capture and save photos directly as JPG going forward, at the cost of somewhat larger file sizes per photo compared to HEIC — a worthwhile tradeoff for anyone who regularly shares photos with people or software that struggle with HEIC files, avoiding the need to convert anything after the fact at all.
A worked example: sharing photos with a client who uses an older PC
Say you took photos on an iPhone for a small business’s website and need to send them to a client whose office PC is a few years old and can’t open HEIC files, and installing new software on that computer isn’t really an option since it’s shared and locked down.
Rather than asking the client to install the Microsoft HEIF extension on a machine you don’t control, convert on your own end before sending. On a Mac, select all the photos in Finder, right-click, and check for a batch Export option, or open them in Preview one at a time if there are only a handful — for a larger batch, an Automator workflow saves real time over a manual one-by-one export.
Confirm the exported JPGs open correctly on your own end before sending, then deliver them as JPG files. This sidesteps the client’s compatibility problem entirely without requiring them to change anything on a computer you don’t have control over.
Batch converting with a free desktop app
Beyond Automator on a Mac, several free desktop apps on both platforms handle batch HEIC-to-JPG conversion directly — select an entire folder, choose JPG as the output format, and convert everything in one action rather than opening each file individually. These are worth installing if HEIC conversion is a recurring task rather than a rare one-off, since the setup time pays for itself after just a handful of uses.
Keeping photo metadata intact during conversion
A HEIC file’s metadata — the date taken, GPS location if enabled, and camera details — generally carries over correctly when converting to JPG through Preview’s Export function or the Windows Photos app, since both are designed to preserve this information by default. Free online converters vary more in this respect; some strip metadata during conversion while others preserve it faithfully, which is worth checking specifically if photo metadata (for organizing a large photo library by date or location later, for instance) matters for your particular use case or long-term photo-organizing workflow going forward, especially for a large existing library you regularly rely on.
Whichever route ends up being used regularly, it’s worth picking one and sticking with it rather than switching methods every time, since a consistent process makes it far easier to spot when something’s actually gone wrong versus when a step was simply skipped by habit.
When something’s not working
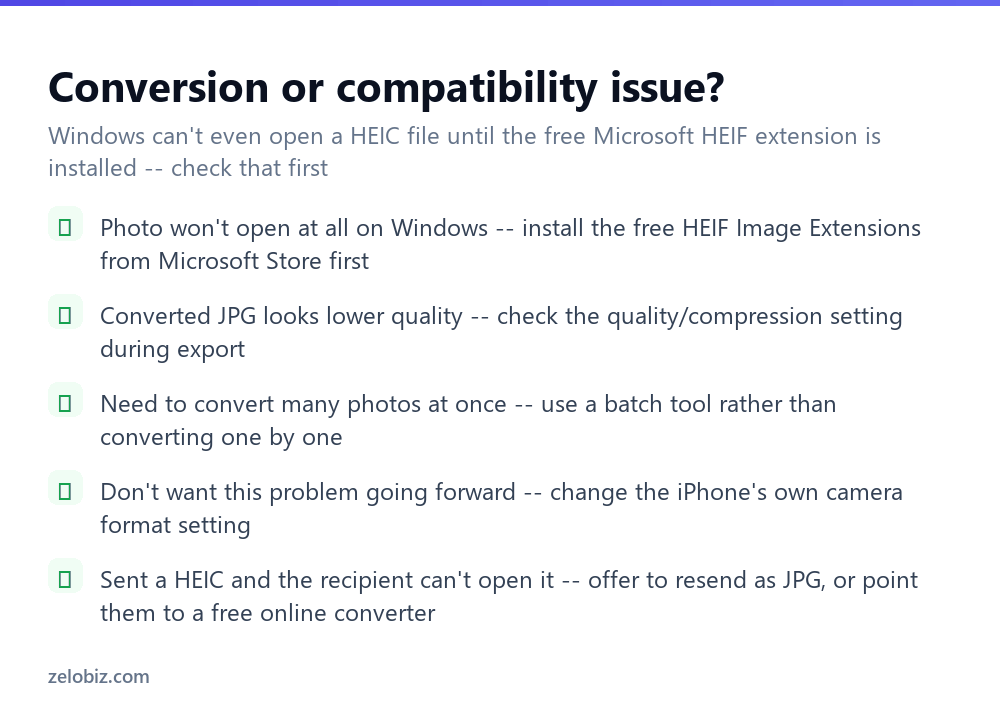
Photo won’t open at all on Windows — install the free HEIF Image Extensions from the Microsoft Store first; this is the single most common cause of a HEIC file appearing completely unopenable on a Windows PC.
Converted JPG looks lower quality than expected — check the quality or compression setting used during export; a lower quality setting produces a smaller file at the cost of visible compression artifacts, particularly noticeable on photos with fine detail.
Need to convert many photos at once — use a batch tool (Automator on Mac, or a dedicated batch converter app) rather than repeating a one-by-one manual export process for a large number of files.
Sent someone a HEIC file and they can’t open it — offer to resend as JPG using any of the methods above, or point them toward installing the free HEIF extension themselves if they’re on Windows and likely to receive HEIC files again in the future.
- ✓Use Preview’s Export option on a Mac for a quick, free, built-in conversion
- ✓Install the free HEIF Image Extensions on Windows before troubleshooting further
- ✓Use a batch tool for converting a large number of photos at once
- ✓Change the iPhone’s camera format to Most Compatible to avoid the issue going forward
- ✓Avoid online converters for anything genuinely sensitive or private
- ✕Assuming a HEIC file is corrupted just because Windows won’t open it without the extension
- ✕Converting dozens of photos one by one when a batch tool would be far faster
- ✕Clicking Export as PDF by mistake instead of the regular Export option in Preview
- ✕Ignoring the iPhone camera format setting as a long-term fix for repeated compatibility issues
- ✕Uploading sensitive photos to an unfamiliar online converter
Frequently asked questions
How do I convert a HEIC photo to JPG on a Mac?
Open it in Preview, go to File, Export, choose JPEG from the Format dropdown, and save — no extra software needed.
Why can’t I open a HEIC photo on Windows?
Windows needs the free HEIF Image Extensions installed from the Microsoft Store before it can open or convert HEIC files at all.
How do I convert many HEIC photos to JPG at once?
Use a batch conversion tool, such as an Automator workflow on Mac, rather than converting each photo individually through a manual export process.
How do I stop my iPhone from taking HEIC photos?
Go to Settings, Camera, Formats, and select Most Compatible instead of High Efficiency — this makes the camera save photos as JPG directly.
Does converting HEIC to JPG reduce photo quality?
There can be some quality loss depending on the export settings used, though it’s often minimal at a reasonably high quality setting.
Is it safe to use a free online HEIC to JPG converter?
For non-sensitive photos, yes. For anything private, avoid online converters since the file passes through a third-party server during conversion.
- →Turn a converted photo into a document: how to convert JPG to PDF
- →Shrink an image file further: how to resize an image
- →Compress several converted files together: how to zip a file
- →Recover an original if something goes wrong: how to recover deleted files