

To unzip a file on Windows, right-click the .zip file in File Explorer and choose Extract All, then confirm the destination folder and click Extract. On a Mac, simply double-click the .zip file — it extracts automatically into a new folder with no menu or dialog needed. Both are built into the operating system with no extra software required for a standard .zip file. Formats like .rar or .7z need separate free software, since neither platform’s built-in tool handles those.
Built-in unzip, by platform
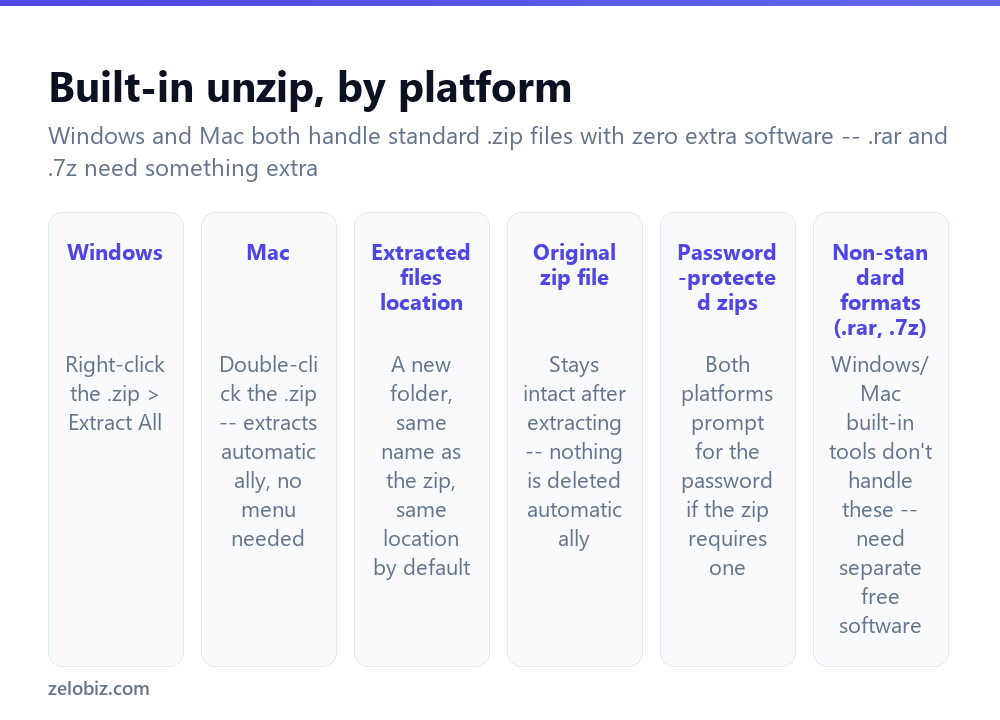
Windows — right-click the .zip file and choose Extract All from the context menu, which opens a small dialog confirming (or letting you change) the destination folder before extracting.
Mac — simply double-click the .zip file. macOS extracts it automatically and immediately, with no menu, dialog, or additional step needed at all.
On both platforms, the extracted contents land in a new folder, typically sharing the same name as the original zip file and located in the same folder as the zip by default. The original .zip file itself remains intact afterward — extracting doesn’t delete or modify it.
Formats like .rar and .7z look similar to a .zip file and serve the same general purpose, but neither Windows’ nor Mac’s built-in tools can open them — they require separate, free third-party software like 7-Zip (Windows) or Keka (Mac).
Unzipping on Windows
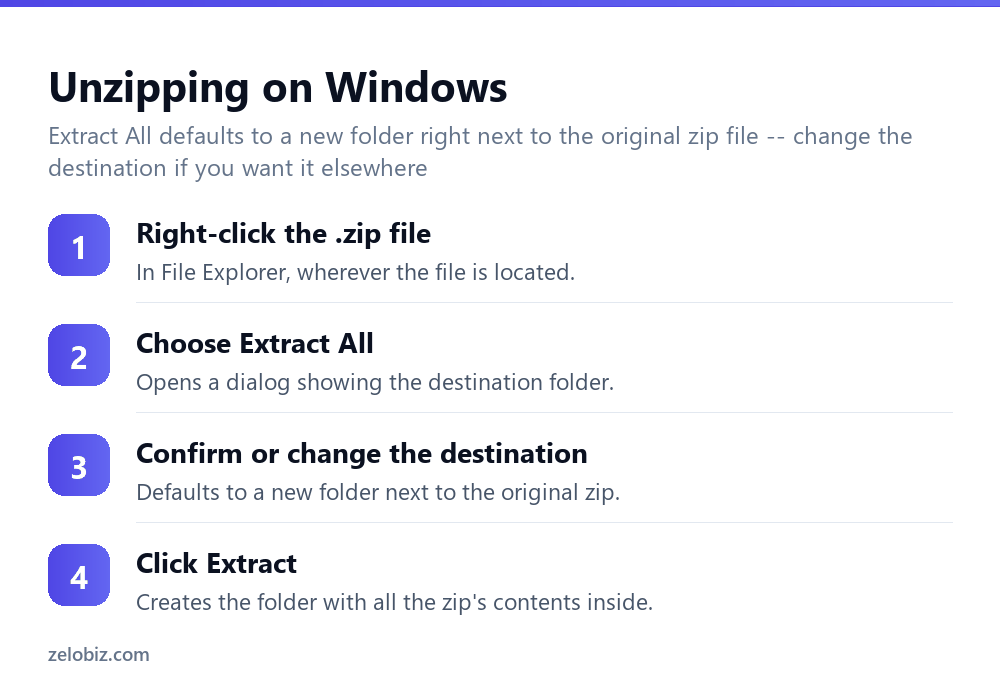
Right-click the .zip file in File Explorer, wherever it’s currently located.
Choose Extract All from the context menu.
A dialog opens showing the destination folder, defaulting to a new folder created right next to the original zip file, named the same as the zip. Change this if you want the contents to land somewhere else instead.
Click Extract. Windows creates the folder and copies every file from inside the zip into it, preserving the original internal folder structure if the zip contained one.
Unzipping on a Mac
This is genuinely as simple as it sounds: double-click the .zip file in Finder. macOS’s built-in Archive Utility handles the rest automatically, creating a new folder with the extracted contents in the same location as the original zip, with no prompts or dialogs needed.
If double-clicking doesn’t trigger extraction for some reason, right-click the file and look for an Open With › Archive Utility option, which manually triggers the same built-in extraction process.
Handling password-protected zip files
If a zip file was created with password protection, both Windows and Mac will prompt for the password during the extraction attempt — there’s no way around this built into either platform’s standard tools, and it isn’t a bug or malfunction if the prompt appears. Contact whoever sent or created the protected zip file for the password if you don’t already have it.
Handling .rar, .7z, and other non-standard archive formats
These are genuinely different compressed archive formats from .zip, even though they serve the same basic purpose of bundling and compressing multiple files together. Neither Windows’ Extract All nor a Mac’s double-click-to-extract handles them natively.
7-Zip (free, Windows) and Keka (free, Mac) are widely used free tools that add support for these formats, alongside standard .zip files — worth installing once if you regularly receive files in these formats, rather than hunting for a workaround each time one arrives.
A worked example: unzipping a project archive from a colleague
Say a colleague emails a zip file containing an entire project folder — documents, spreadsheets, and a few images — and it needs extracting to a specific project folder on your computer, not just wherever it happens to land after downloading.
On Windows, rather than accepting the default extraction location next to the downloaded zip (likely a Downloads folder), use Extract All and specifically change the destination in that dialog to the actual project folder before clicking Extract — this avoids a second manual step of moving the extracted folder afterward.
On a Mac, double-clicking extracts to the same location as the zip by default with no destination choice offered in that simple flow. If you need it to land somewhere specific, extract first (double-click), then drag the resulting folder to the actual destination afterward, or move the zip file itself to the target folder before double-clicking it there in the first place.
Once extracted, delete the original zip file only after confirming every expected file is present and opens correctly — a zip that seemed to extract successfully occasionally still has a corrupted individual file inside it, and keeping the zip around briefly as a fallback costs nothing until you’re confident everything is genuinely fine.
Unzipping directly to a specific location without moving files afterward
On Windows, beyond the default Extract All flow, right-clicking a zip file also often offers a submenu with quick-extract options — “Extract to [folder name]\” creates a folder with that name in the current location automatically, without the extra dialog step, useful when the default naming and location are already exactly what’s wanted.
On a Mac, dragging a zip file directly into a specific target folder in Finder before double-clicking it accomplishes the same practical result as manually specifying a destination on Windows, since the extraction always happens alongside wherever the zip file itself currently sits.
Checking what’s inside a zip before extracting everything
For a large zip file where only specific contents are actually needed, both platforms allow previewing the contents without extracting the whole archive first. On Windows, double-clicking (rather than right-clicking, Extract All) opens the zip as a browsable virtual folder, letting you copy out just the specific files needed rather than extracting everything. On a Mac, some third-party archive tools offer a similar preview-before-extracting capability, though the built-in double-click method always extracts the full contents rather than offering a selective preview first.
Zip files containing other zip files
Occasionally a downloaded zip contains another zip file nested inside it, rather than the actual files directly — this happens more often than expected with certain download or export tools that wrap content in an extra layer of compression. If extracting a zip reveals just a single file that’s itself another zip rather than the documents you expected, that inner file needs extracting again using the same process, one more level deep, before reaching the actual usable content underneath it all, which can happen more than once with some particularly nested download or export tools out there in the wild today.
None of this requires remembering much beyond the basic extraction steps — the nested-zip and nothing-happened cases are both rare enough that most people go months between encountering either one, and the fix each time is simply repeating the same extraction step again.
When something’s not working
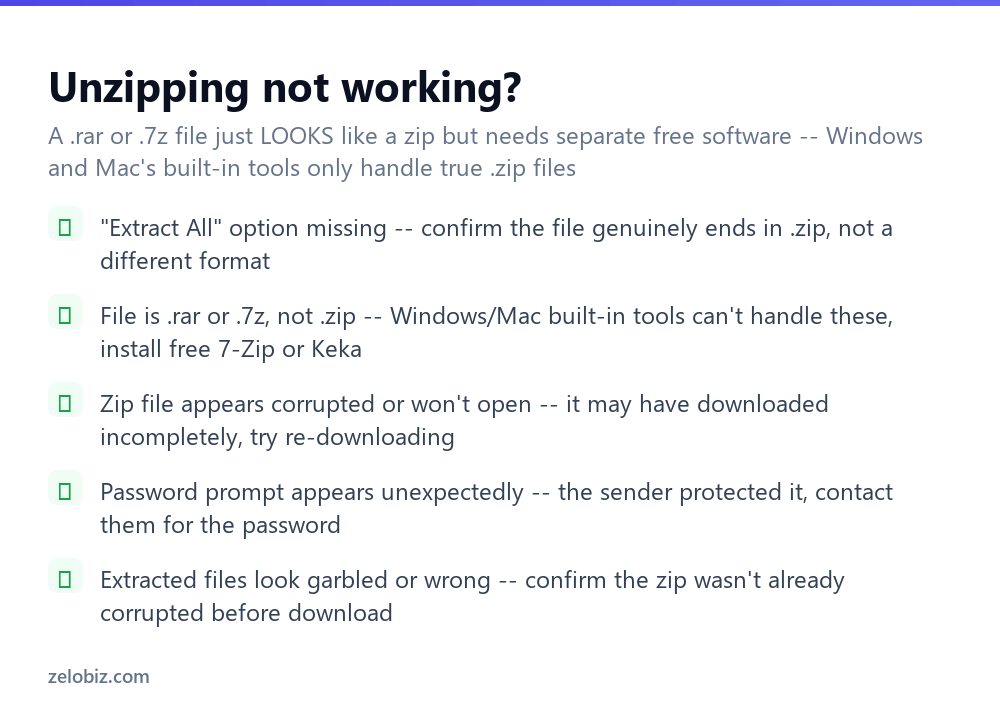
“Extract All” option is missing on Windows — confirm the file genuinely has a .zip extension; a file merely named to look like a zip, or actually in a different archive format, won’t show the standard extract option.
The file is actually .rar or .7z, not .zip — install 7-Zip (Windows) or Keka (Mac), since neither platform’s built-in tool handles these formats natively.
The zip file appears corrupted or won’t open at all — it may have downloaded incompletely or been interrupted mid-download; try re-downloading it fresh before assuming the file itself is genuinely damaged.
A password prompt appears unexpectedly — this means the sender protected the zip intentionally; there’s no built-in way to bypass it, so contact them directly for the password.
Extracted files look garbled or incorrect — this usually traces back to the same root cause as an unopenable zip: the original file was likely corrupted or incompletely downloaded before extraction was even attempted.
- ✓Right-click and Extract All on Windows, or simply double-click on a Mac
- ✓Confirm the actual file extension before assuming a standard zip tool should work
- ✓Install 7-Zip or Keka once if you regularly receive .rar or .7z files
- ✓Re-download a zip file that appears corrupted before assuming it’s permanently broken
- ✓Contact the sender directly for a password rather than searching for a bypass
- ✕Assuming a .rar or .7z file is simply a broken zip when it’s a different format entirely
- ✕Trying to open a password-protected zip without the actual password
- ✕Deleting a zip file immediately after a failed extraction attempt before troubleshooting
- ✕Searching for a way to bypass zip password protection instead of contacting the sender
- ✕Assuming Windows and Mac both need the same steps — the actual process differs between them
Frequently asked questions
How do I unzip a file on Windows?
Right-click the .zip file in File Explorer and choose Extract All, then confirm the destination folder and click Extract.
How do I unzip a file on a Mac?
Double-click the .zip file. macOS extracts it automatically into a new folder with no additional steps needed.
Why can’t I open a .rar or .7z file the same way as a .zip file?
These are different archive formats. Neither Windows’ nor Mac’s built-in tools handle them — free software like 7-Zip or Keka is needed.
Does unzipping a file delete the original zip?
No. The original .zip file stays intact after extraction; a new folder with the extracted contents is created alongside it.
Why is a zip file asking for a password when I try to open it?
The zip was created with password protection by whoever sent it. Contact them directly for the password — there’s no built-in bypass.
Why does a zip file appear corrupted or won’t extract?
It likely downloaded incompletely or was interrupted. Try re-downloading it fresh before assuming the file is permanently damaged.
- →Compress files the other direction: how to zip a file
- →Recover a file if extraction goes wrong: how to recover deleted files
- →Convert extracted images to another format: how to convert HEIC to JPG
- →Turn extracted documents into PDFs: how to convert JPG to PDF