
To add a signature in Gmail, click the gear icon > See all settings, scroll to “Signature” under the General tab, and click “Create new” to build one using the built-in editor. Set it as the default for both “New emails” and “Replies/forward” — these are two separate dropdowns, and it’s easy to set one and forget the other. Scroll down and click “Save Changes” at the bottom of the page, since the signature won’t actually apply until that’s clicked.
The Attachment Nobody Warns You About: image001.png
Every guide to adding a signature in Gmail covers uploading a logo and getting it to display correctly in your own inbox, and then stops there. What they skip is what happens once that email leaves Gmail: a logo that looks perfect in your own inbox can arrive at an Outlook recipient with an extra file attached, usually named something like image001.png, sitting alongside the message as if you’d deliberately attached it.
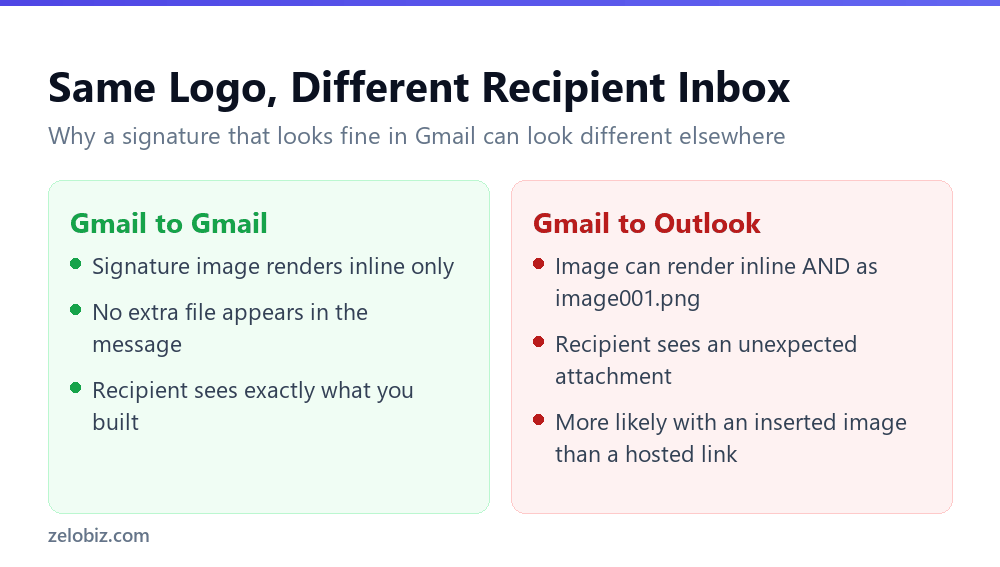
Gmail embeds a signature image as an inline part of the message so it renders where you placed it, rather than as a normal attachment. Some Outlook clients, particularly older desktop versions, don’t consistently treat that inline part as display-only, and list it as a downloadable file in addition to rendering it. There’s no toggle inside Gmail that fixes this for every recipient, since the behaviour lives on the receiving end.
⚠️ Watch out: This is most noticeable with a small headshot or company logo dropped straight into the signature editor. It’s far less common with plain text signatures, and less common again when the image is inserted as a hosted link (choosing “Web Address (URL)” in Gmail’s image dialog) rather than uploaded directly, since a linked image behaves more like a normal loaded resource than an embedded MIME part.
If a client or colleague mentions seeing a stray attachment on your emails, it’s worth checking with them once whether it’s a one-off or happens consistently, and on what device and email app they’re using, since the pattern often points to a specific client rather than anything wrong with your account. There isn’t a guaranteed fix available from the Gmail side, but hosting the logo externally and linking to it, keeping the image small, and avoiding stacking multiple images in one signature all reduce how often it happens in practice.
Setting up a Gmail signature

Settings (gear icon) > See all settings — opens the full settings page, distinct from the smaller quick-access settings panel that appears by default.
Scroll to “Signature” — found under the General tab, roughly partway down the settings page.
Create and format your signature — add text, links, or an image using the built-in rich text editor, similar to formatting options within an email itself.
Set defaults for New emails AND Replies — two separate dropdowns; it’s easy to set one and completely miss setting the other, resulting in the signature appearing on new emails but not replies, or vice versa.
Click “Save Changes” at the bottom — the signature won’t apply to any outgoing email until this final step is clicked.
New emails and Replies/forwards use two separate default dropdowns for the signature setting — this is the single most common reason a signature seems to be “missing” from some emails but not others; both need to be set independently for full, consistent coverage.
Adding your signature
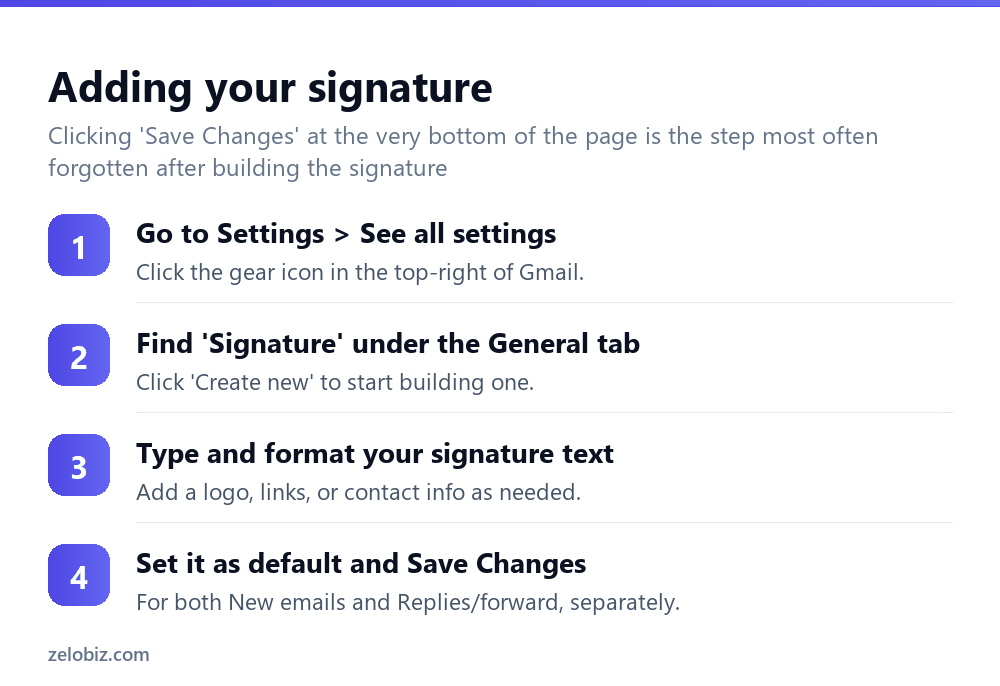
Go to Settings > See all settings — accessed via the gear icon in the top-right corner of the Gmail interface.
Find “Signature” under the General tab — click “Create new” to start building a signature from scratch.
Type and format your signature text — adding a logo, relevant links, or contact information as needed for the specific use case.
Set it as default and Save Changes — for both New emails and Replies/forward separately, then scroll down and click Save Changes at the very bottom of the page.
Adding an image or logo to a signature
The signature editor’s toolbar includes an image insert option, allowing a company logo or a personal headshot to be added directly. It’s worth using an appropriately sized image rather than an oversized one, since an overly large image can make the signature look disproportionate or push important text below the visible fold in a recipient’s inbox preview.
Worth knowing: some email clients block external images by default until the recipient specifically clicks to display them, meaning an image-based signature may not always render immediately for every recipient — keeping essential contact information as actual text within the signature, rather than embedded only within an image, ensures it’s still readable even if the image itself doesn’t load.
Gmail’s image dialog offers two ways in: uploading a file directly, or pasting a “Web Address (URL)” that points to an image already hosted somewhere, such as a company website or a shared Drive link set to public. Uploading is simpler and works for most people. Linking to a hosted URL is worth the extra setup for anyone who has run into the attachment issue above, since a linked image is fetched by the recipient’s client rather than embedded in the message itself, which sidesteps the specific mechanism that causes some Outlook clients to double it up as a file.
Multiple signatures for different accounts or purposes
Gmail supports creating multiple signatures, useful for someone managing separate email aliases or needing a different signature style for different types of correspondence (a more formal signature for client emails versus a shorter one for internal team messages, for instance). Each saved signature can be set as the default independently, and it’s also possible to manually select a different signature when composing a specific email rather than always using whichever one is set as the default.
A worked example: a small business setting up consistent team signatures
Say a small business owner wants every team member’s email to include a consistent, professional signature — company logo, name, title, and contact details — rather than each person building their own inconsistent version, or worse, no signature at all.
Rather than emailing each employee instructions and hoping everyone follows them consistently, they build one signature template first in their own Gmail account, including the company logo (uploaded as an appropriately sized image, not an oversized one), name and title placeholders clearly marked, and a consistent font and color scheme matching the company’s actual branding. They then copy the signature’s HTML source and share simple setup instructions with the team, having each person paste it in and swap just their own name and title into the placeholder text.
For anyone on Google Workspace specifically (rather than personal Gmail accounts), a workspace admin can instead set this up centrally through the Google Admin console’s Gmail settings, pushing a single consistent signature template to every user in the organization automatically, removing the need for each person to manually copy and configure anything themselves — a considerably more reliable approach for a team larger than a handful of people, where manual setup consistency becomes harder to enforce.
Once set up, they specifically test by sending both a new email and a reply from one team member’s account, confirming the signature appears correctly in both cases — catching the common New-emails-versus-Replies gap before it becomes a pattern across the whole team’s outgoing mail rather than an isolated one-person mistake.
Signatures with a call-to-action or banner
Beyond basic contact information, some signatures include a promotional banner or a specific call-to-action — a link to book a meeting, a recent piece of content, or an upcoming event. These are built the same way as a logo, inserted as an image (optionally wrapped in a clickable link via the editor’s link-insert tool) directly within the signature editor.
It’s worth keeping this kind of addition modest in size and frequency of change — a signature that looks meaningfully different or promotional on every single email can start to feel less like a professional signature and more like an advertisement attached to routine correspondence, which isn’t always the impression actually intended.
A useful middle ground is rotating a promotional element occasionally — monthly or quarterly, tied to an actual event or announcement — rather than either never updating it or changing it so often that recipients stop registering it as meaningful content at all worth actually paying attention to in a busy, crowded inbox each day of the working week, month after month, year after year, indefinitely.
Plain text vs. formatted signatures
For situations where a simple, minimal signature is preferred — some recipients or industries favor a plain, unstyled sign-off over a logo-heavy formatted one — Gmail’s signature editor supports plain text just as easily as rich formatting, simply by not applying any bold, color, or image elements. A plain text signature also renders more predictably across different email clients, since it has nothing for a recipient’s client to potentially strip or alter on receipt.
Signature not appearing?
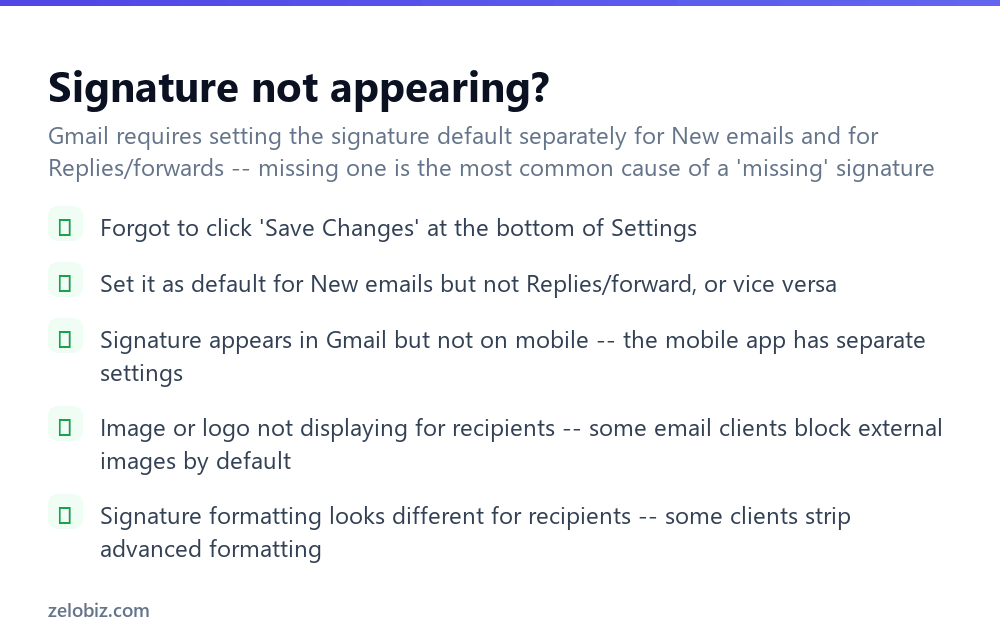
Forgot to click “Save Changes” — at the very bottom of the Settings page; without this click, no changes made above actually take effect.
Set default for New emails but not Replies/forward, or vice versa — both dropdowns need to be set independently for consistent coverage across all outgoing emails.
Signature appears in Gmail but not on mobile — the Gmail mobile app maintains its own separate signature setting, found within the app’s own Settings menu, distinct from the desktop version.
Image or logo not displaying for recipients — some email clients block external images by default; this is a recipient-side setting outside the sender’s direct control.
Signature formatting looks different for recipients — some email clients strip or alter advanced formatting on receipt, which can occasionally make a heavily styled signature look different than intended once it actually arrives.
- ✓Set the signature default for both New emails and Replies/forward separately
- ✓Click ‘Save Changes’ at the bottom of Settings after making any edits
- ✓Keep essential contact info as text, not only embedded within an image
- ✓Check the Gmail mobile app’s own separate signature setting if needed there too
- ✓Use an appropriately sized image or logo rather than an oversized one
- ✕Assuming setting one default dropdown automatically covers both new emails and replies
- ✕Forgetting to click Save Changes after building or editing a signature
- ✕Relying entirely on an image for contact information that should also be readable text
- ✕Assuming a desktop Gmail signature automatically applies to the mobile app too
- ✕Using an oversized image that pushes signature text out of a recipient’s inbox preview
Worked example: a signature built to survive different email clients
A consultant wants a signature that reads clearly whether it lands in Gmail, Outlook, or a phone’s default mail app, without triggering the attachment issue above.
The layout that holds up best keeps the essentials as plain text first: name on one line, title and company on the next, phone and website on a third. Text always renders, regardless of client, image blocking, or dark mode, which makes it the part doing the actual work of identifying who sent the email.
The logo goes below that block, not beside it, and stays small, roughly 150 pixels wide is plenty for a signature. A single small image is far less likely to trigger the Outlook attachment behaviour than a signature carrying both a headshot and a separate company logo, since each embedded image is its own opportunity for a recipient’s client to mishandle it.
This is also where the earlier point about setting the signature for both “New emails” and “Replies/forward” separately matters most, since it’s easy to get one of the two dropdowns right and forget the other. A signature built this carefully is wasted if it only applies to new messages and a plain, unbranded reply goes out instead, which is exactly the setup mistake covered above.
None of this guarantees that every recipient’s email client will behave itself. It does reduce how often that happens, and it keeps the signature readable for recipients whose email client blocks images by default, something a text-only fallback handles automatically and an image-only signature can’t handle at all.
Frequently asked questions
Why does my Gmail signature logo show up as image001.png for some recipients?
This is a known rendering quirk in some Outlook clients, which can list an inline signature image as a downloadable attachment as well as displaying it. It isn’t a Gmail setup mistake, and keeping the image small and using a single logo instead of several reduces how often it happens.
How do I add a signature in Gmail?
Go to Settings > See all settings, scroll to Signature under the General tab, create one, set it as default for both New emails and Replies, and click Save Changes.
Why isn’t my Gmail signature showing up on replies?
New emails and Replies/forward use separate default dropdowns. Set both independently for the signature to appear consistently.
Does my Gmail signature work on the mobile app too?
Not automatically — the Gmail mobile app has its own separate signature setting that needs to be configured independently.
Can I have multiple signatures in Gmail?
Yes, Gmail supports creating multiple signatures, and you can manually select a different one when composing a specific email.
Why isn’t my signature’s image showing up for recipients?
Some email clients block external images by default until the recipient clicks to display them — this is on the recipient’s end, not something you can fully control.
Why did I lose my Gmail signature settings?
Most likely, ‘Save Changes’ wasn’t clicked at the bottom of the Settings page after the signature was created or edited.
- →Store signature images or logos in Drive: how to use Google Drive
- →Send a signed document as PDF: how to convert Google Doc to PDF
- →Collect contact info via a form instead: how to make a Google Form
- →Track contacts in a shared sheet: how to use Google Sheets