

To change screen resolution in Windows, right-click the desktop and choose Display settings, then pick a value under Display resolution. Choose the one marked (Recommended) — that’s your monitor’s native resolution and the only setting that looks properly sharp. If everything is too small to read, change Scale instead, not resolution.
The mistake almost everyone makes
People lower their resolution because text and icons are too small. It works, in the sense that things get bigger. It also makes the whole display blurry, and most people assume that’s just how the monitor looks now.
Every LCD and OLED panel has a fixed grid of physical pixels — its native resolution. Feed it exactly that many pixels and each one maps perfectly to a pixel on screen. Feed it fewer and the monitor has to stretch the image, interpolating between pixels. That interpolation is the blur.
The setting you actually want is Scale, directly above resolution in the same panel. Scaling tells Windows to draw everything larger while keeping the native pixel grid. Bigger and sharp, rather than bigger and soft.
Lowering resolution makes things bigger by making them worse. Scaling makes them bigger and leaves them sharp.

Changing resolution
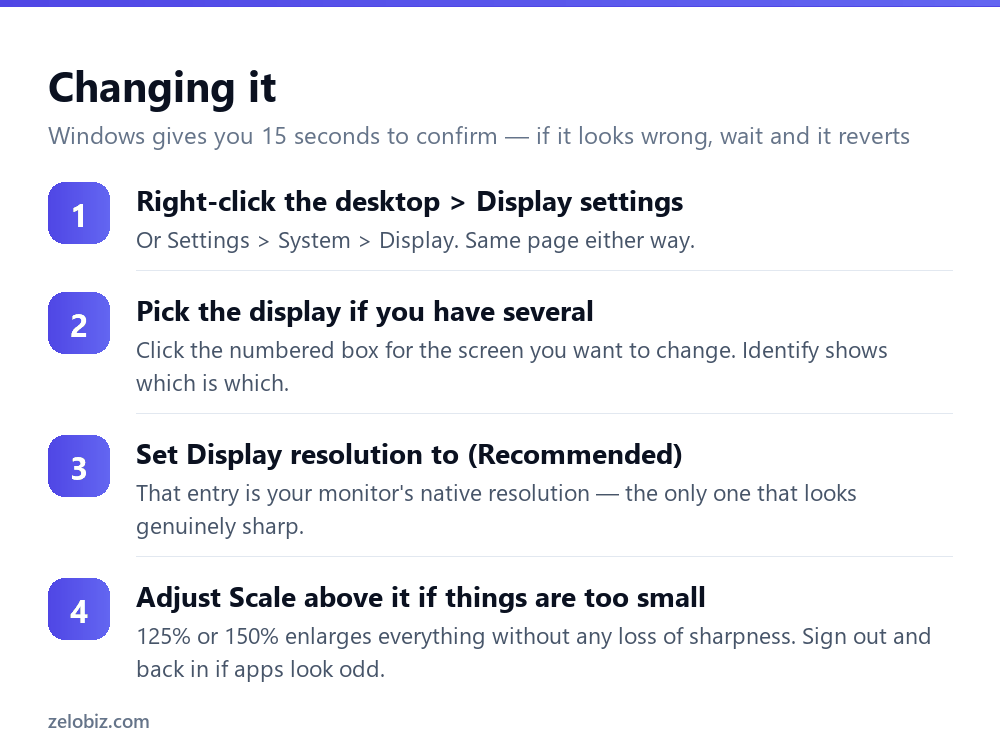
Windows gives you fifteen seconds to click Keep changes after a resolution switch. If the screen goes black or garbled, do nothing — it reverts automatically. That safety net is why it’s fine to experiment.
Getting scaling right
Scaling percentages aren’t arbitrary. Windows offers 100, 125, 150 and 175% as presets, and 125% or 150% suits most people on a high-resolution display.
A 4K laptop screen at 100% scaling renders text at roughly half the physical size of the same text on a 1080p screen — technically correct and practically unreadable. Windows usually defaults such machines to 150% or 200% for exactly this reason.
Custom scaling, and why to avoid it
There’s a custom scaling option accepting any value between 100 and 500%. It applies system-wide, can’t be set per-monitor, and older applications frequently render badly at non-standard values. Stick to the presets unless you have a specific reason.
⚠️ Watch out: Some applications only pick up a scaling change after you sign out and back in. If menus look oversized or blurry immediately afterwards, that’s why — sign out rather than assuming it’s broken.
Aspect ratio, and the stretched-picture problem
If everything looks horizontally squashed or stretched — circles as ovals, faces too wide — the resolution you’ve selected has the wrong shape for the panel.
Nearly all modern monitors are 16:9, and 1920×1080, 2560×1440 and 3840×2160 all share that ratio. Pick something like 1280×1024, which is 5:4, and the monitor either stretches the image to fill the width or adds black bars. Sticking to the Recommended resolution avoids this entirely.
Some monitors have a scaling or aspect-control setting in their own on-screen menu, separate from Windows — options like Full, Aspect or 1:1. If the image still looks wrong at native resolution, that menu is where to look next.
Multiple monitors with different resolutions
Mixing a 4K laptop screen with a 1080p external monitor is common and used to be genuinely painful. It’s manageable now, with one important detail.
Scaling is per-display. Click each numbered monitor in Display settings and set its scale independently — 150% on the laptop panel, 100% on the external. Windows handles the difference as you drag windows between them.
Dragging a window across the boundary may briefly show it at the wrong size before it redraws. That’s normal. Applications that don’t handle scaling properly — usually older ones — can stay blurry on the second screen until you restart them.
Also arrange the monitors to match reality. Drag the numbered boxes so their relative positions mirror your desk, or your mouse will exit the wrong edge and you’ll spend months mildly annoyed by it.
When the resolution you want isn’t listed
The graphics driver
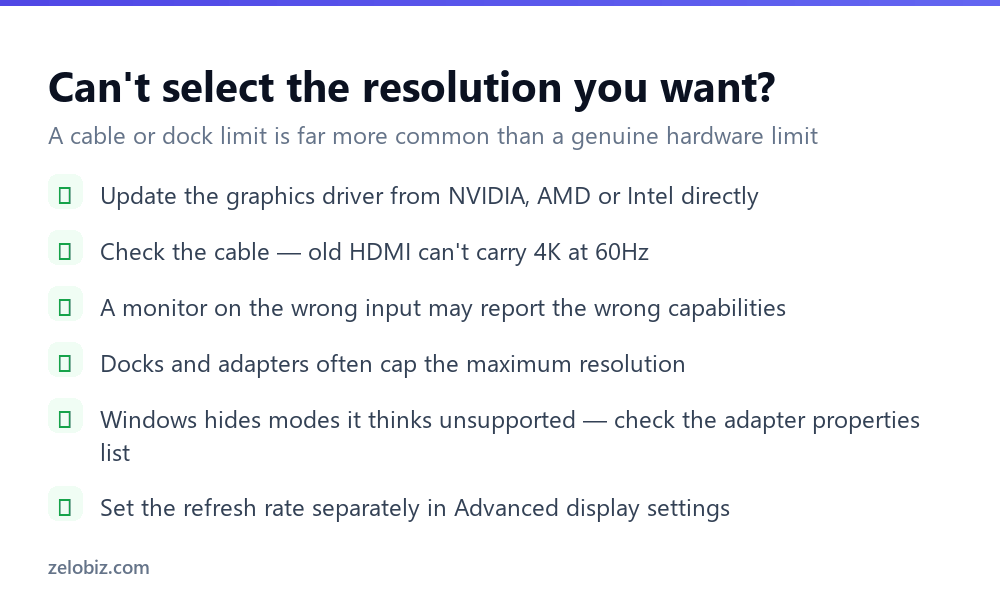
A generic Microsoft display driver supports only basic modes. If your list is short and tops out well below what the monitor claims, install the proper driver from NVIDIA, AMD or Intel. This is the most common cause by a wide margin.
The cable
HDMI and DisplayPort come in versions with different bandwidth limits. An older HDMI cable will happily carry 4K at 30Hz and refuse 4K at 60Hz — the monitor works, just not at the resolution and refresh rate you paid for. Cables are cheap; this is worth ruling out early.
Docks and adapters
USB-C docks and display adapters have their own maximum output, often lower than either the laptop or the monitor. Connect the monitor directly to the laptop to test. If the resolution appears when direct and vanishes through the dock, the dock is the limit.
Forcing a hidden mode
Under Advanced display settings › Display adapter properties › List All Modes you’ll find every mode the adapter can technically produce, including ones Windows hides. Use with care — selecting a mode the monitor can’t handle gives you a black screen, though the fifteen-second timeout still saves you.
Orientation, and the accidental sideways screen
Directly below resolution sits Display orientation, and it’s the cause of one of the more alarming-looking accidents in Windows.
Ctrl + Alt + arrow key rotates the display on some Intel graphics systems. Hit it by mistake and your screen is suddenly sideways, with the mouse moving in a direction that no longer makes sense. Ctrl + Alt + Up arrow puts it back, or set orientation to Landscape in Display settings.
Deliberate rotation is genuinely useful, mind — a monitor turned 90 degrees into Portrait is excellent for reading documents, code and long web pages. Set the monitor physically on its stand, then match it with Portrait in Windows.
Resolution in games
Games set their own resolution independently of Windows, which is why a game can look soft while the desktop looks perfect.
Check the game’s own display settings and set it to your monitor’s native resolution with Fullscreen or Borderless. If performance is poor, lowering in-game resolution is a legitimate trade — unlike on the desktop, where you’d simply change scaling instead.
Modern games often offer upscaling — DLSS, FSR or XeSS — which renders internally at a lower resolution and reconstructs to native. That gives you most of the performance of a lower resolution while keeping output sharp, and it’s a better first move than dropping resolution outright.
Refresh rate is a separate setting
Frequently confused with resolution and controlled elsewhere. A 144Hz gaming monitor connected and left alone will often run at 60Hz, because Windows doesn’t always pick the maximum by default.
Go to Advanced display settings and check Choose a refresh rate. If your monitor supports more than 60Hz, select the highest available. The difference in how smoothly windows and the cursor move is immediately obvious, and a lot of people never realise they’ve been running a high-refresh display at 60Hz for years.
💡 Pro tip: Bear in mind resolution and refresh rate compete for the same cable bandwidth. You may have to choose between 4K at 60Hz and 1440p at 144Hz depending on the connection.
- ✓Keep resolution at (Recommended) and adjust scaling instead
- ✓Set scaling per-monitor on mixed-resolution setups
- ✓Check the refresh rate separately in Advanced display settings
- ✓Test the monitor connected directly before blaming the dock
- ✓Wait out the 15-second timer if the screen looks wrong
- ✕Lowering resolution to make text bigger
- ✕Using custom scaling values instead of the presets
- ✕Assuming a short resolution list means the hardware can’t do more
- ✕Ignoring cable version when 4K at 60Hz isn’t offered
- ✕Leaving a 144Hz monitor running at 60Hz
Frequently asked questions
How do I change screen resolution in Windows 11?
Right-click the desktop and choose Display settings, or go to Settings, System, Display. Pick a value under Display resolution — ideally the one marked (Recommended), which is your monitor’s native resolution.
Why is my screen blurry after changing resolution?
Because you’re no longer running at the monitor’s native resolution, so the panel is stretching the image. Set it back to (Recommended) and increase the Scale setting instead if things are too small.
What is the difference between resolution and scaling?
Resolution is how many pixels the screen displays. Scaling is how large Windows draws things within those pixels. To make items bigger without losing sharpness, raise scaling and leave resolution at native.
Why can’t I select a higher resolution?
Usually a generic graphics driver, an older cable that can’t carry the bandwidth, or a dock capping the output. Install the proper driver first, then test the monitor connected directly to rule out the dock.
Can I use different scaling on two monitors?
Yes. Click each display in Display settings and set its Scale independently. Some older applications need restarting before they render correctly at the new scale.
How do I change refresh rate?
Settings, System, Display, Advanced display settings, then Choose a refresh rate. It’s separate from resolution, and Windows does not always default to the highest your monitor supports.
- →Arrange windows across your displays — how to split screen on Windows
- →Capture what’s on screen: how to screenshot on Windows
- →Driver updates come through how to update Windows
- →Check GPU load in how to open Task Manager