
To transfer photos from iPhone to computer, the most reliable method for a full library is a USB cable — connect the iPhone, open the Photos app (Mac) or File Explorer (Windows), and import. For just a handful of specific photos to a Mac, AirDrop is faster and wireless. For ongoing, automatic transfer with no cable ever needed, iCloud Photos or Google Photos sync photos to the cloud, accessible from any computer, though this depends on having enough cloud storage and waiting for sync to complete.
Which method actually fits your situation
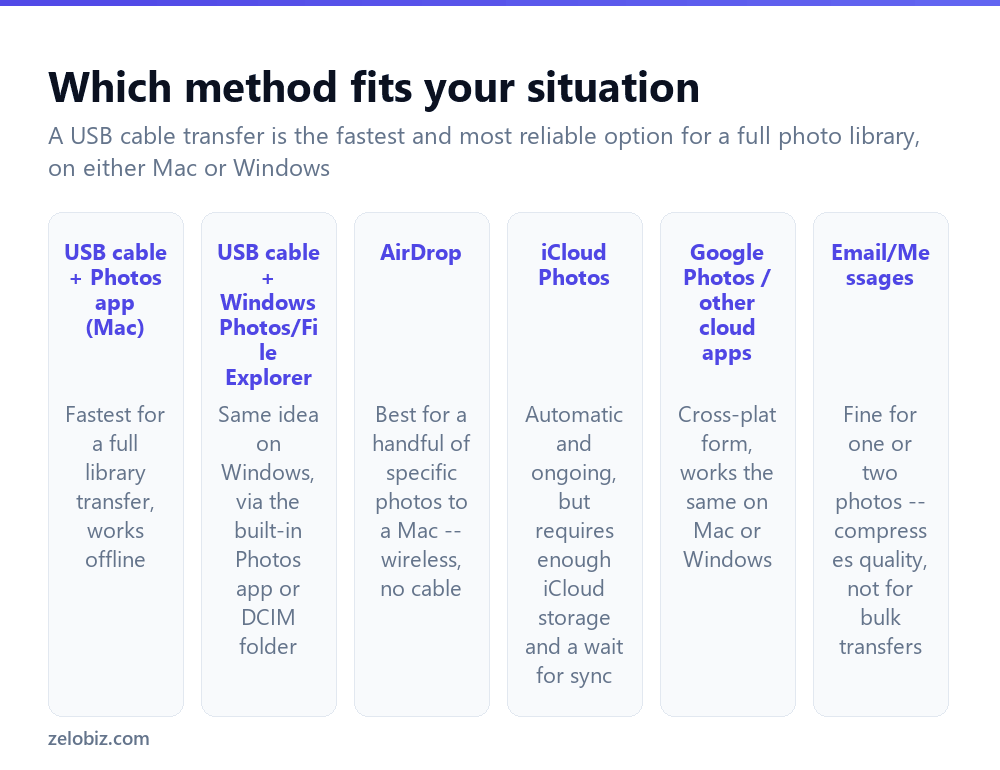
USB cable is the fastest and most reliable option for transferring a large number of photos at once, works entirely offline with no cloud storage or upload wait involved, and works on both Mac and Windows, though through different apps on each.
AirDrop suits a small, specific selection of photos being sent to a Mac specifically — it’s wireless, near-instant over a local connection, but isn’t available for transferring to a Windows computer at all, since it’s an Apple-only technology.
iCloud Photos keeps a Mac’s Photos library (or a Windows PC with iCloud for Windows installed) continuously synced with the iPhone’s library automatically — convenient for ongoing use, but requires enough iCloud storage for the full library and genuine time for initial sync to complete, especially for a large existing photo collection.
Google Photos or a similar cloud app works identically regardless of computer platform, syncing through Google’s own storage rather than Apple’s, which suits anyone already using Google Photos as their primary photo backup regardless of device brand.
Email and messaging apps technically transfer photos too, but most compress image quality automatically and are only practical for one or two photos at a time — not a genuine method for anything beyond a handful of images.
Transferring via USB cable on a Mac
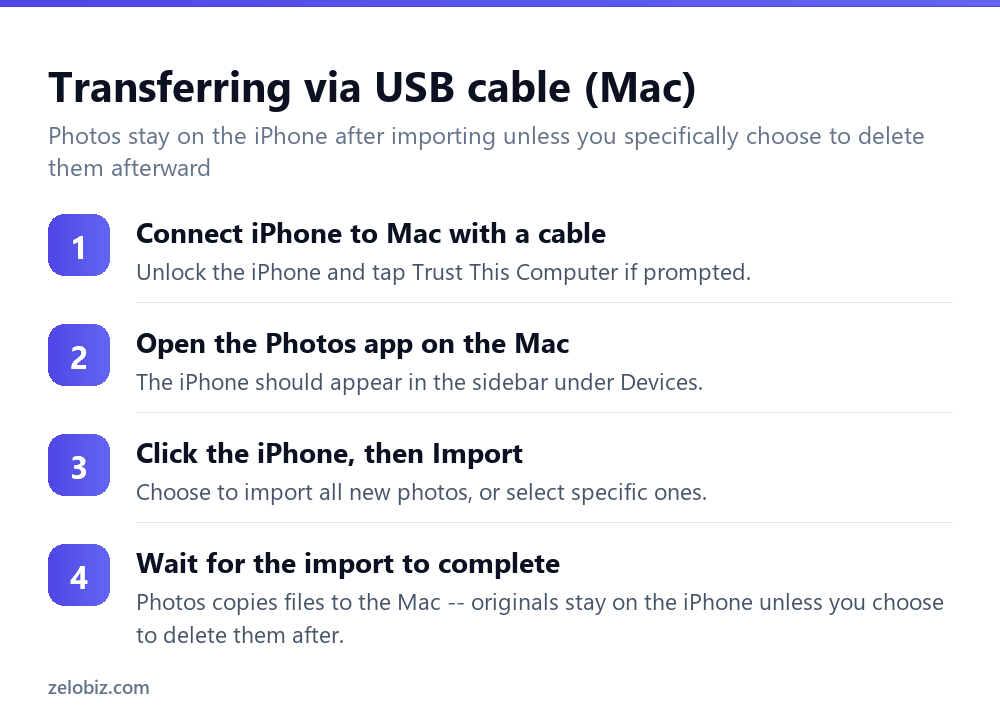
Connect the iPhone to the Mac with a cable that supports data transfer, not a charge-only cable. Unlock the iPhone, and tap Trust This Computer if prompted — this confirmation is required before any data transfer can happen.
Open the Photos app on the Mac. The connected iPhone should appear in the sidebar under Devices.
Click the iPhone in that sidebar, then click Import. Choose to import all new photos not already on the Mac, or manually select specific ones from the grid that appears.
Wait for the import to complete — the original photos remain on the iPhone after import by default, unless you specifically choose the option to delete them from the iPhone after a successful import.
Transferring via USB cable on Windows
Connect the iPhone with a data-capable cable, unlock it, and tap Trust This Computer when prompted, the same as on a Mac.
Windows’ built-in Photos app typically detects the connected iPhone and offers an import option directly. Alternatively, open File Explorer, navigate to the iPhone (listed as a device), and browse into its DCIM folder, which contains the raw photo and video files organized into subfolders by roughly when they were taken — these can be copied and pasted like any other files.
Using iCloud Photos for automatic sync
On a Mac, enabling iCloud Photos (System Settings, your Apple ID name, iCloud, Photos) keeps the Mac’s Photos library and the iPhone’s library continuously synchronized — new photos taken on the iPhone appear on the Mac automatically over time, without ever connecting a cable.
On Windows, installing iCloud for Windows from the Microsoft Store provides similar functionality, syncing iCloud Photos into a folder accessible from File Explorer.
The tradeoff: this requires enough iCloud storage to hold the full photo library (the free tier is limited, and a large library often needs a paid iCloud storage plan), and initial sync for an existing large library can take real time to fully complete, particularly over a slower internet connection.
A worked example: moving an entire photo library to a new Windows PC
Say you’re switching from an old computer to a new Windows PC and want your full iPhone photo library on it, several years and thousands of photos, not just a recent handful.
For a library this size, a USB cable transfer is the right choice over AirDrop (Apple-only, not applicable here) or cloud sync (which could take a very long time to upload and download a multi-thousand-photo library over a typical home internet connection). Connect the iPhone with a genuine data cable, unlock it, accept Trust This Computer, then use File Explorer to navigate into the iPhone’s DCIM folder rather than relying solely on the Windows Photos app’s import wizard, which can sometimes struggle or time out on very large libraries.
The DCIM folder organizes photos into subfolders roughly by date ranges rather than one flat folder — select all the subfolders and copy them to a destination folder on the new PC directly through File Explorer, which handles a large bulk copy more reliably than an import wizard designed around smaller, more typical transfers.
For a transfer this size, budget real time — potentially an hour or more depending on the exact photo and video count and file sizes involved — and avoid disconnecting the cable or letting the iPhone lock and go to sleep mid-transfer, which can interrupt an in-progress copy.
Transferring videos alongside photos
All the methods above handle videos the same way as photos — they’re included automatically in a Camera Roll or DCIM folder transfer, with no separate process needed. The practical difference is simply size: videos, and especially 4K or slow-motion videos, are dramatically larger files than still photos, and a library with a significant number of videos will take noticeably longer to transfer by any method, cloud sync in particular, than the same library would with photos alone — worth factoring into how much time to realistically set aside before starting a large transfer of either kind on any device or method chosen, especially over a cloud connection rather than a direct cable.
For a video-heavy library specifically, a cable transfer is worth prioritizing over cloud sync as the primary method, reserving cloud sync as a secondary, slower backup running quietly in the background rather than the main transfer method relied on.
When something’s not working
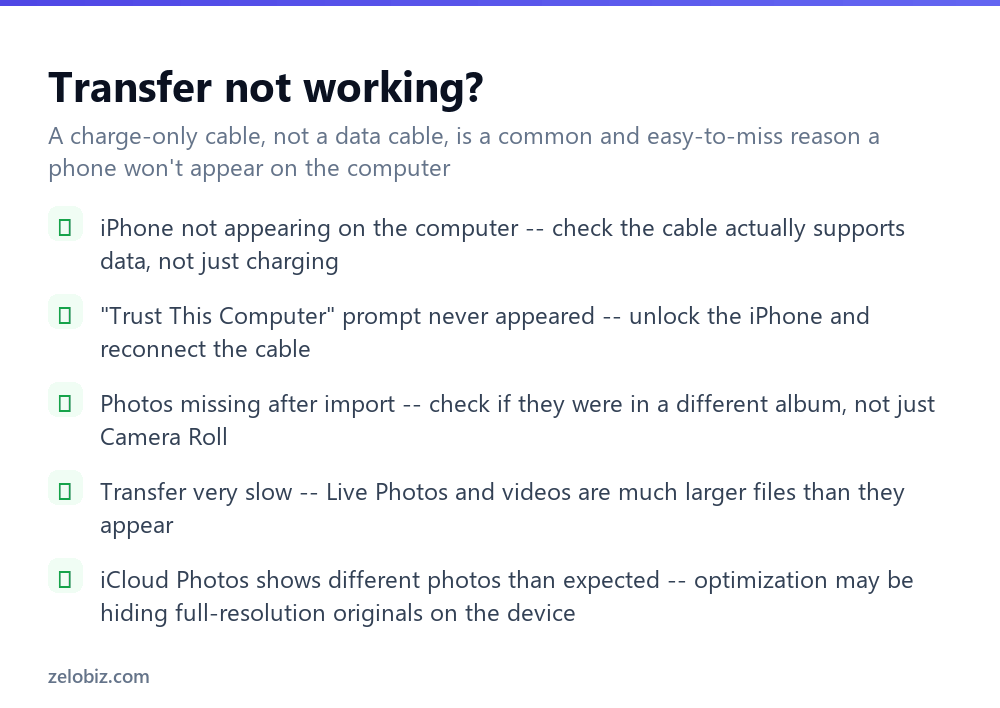
iPhone not appearing on the computer at all — confirm the cable genuinely supports data transfer, not just charging. Some cheaper or older cables are charge-only and won’t establish a data connection even though charging works fine over the same cable.
The “Trust This Computer” prompt never appeared — unlock the iPhone fully (not just wake the screen) and try disconnecting and reconnecting the cable; the prompt sometimes needs the device to be actively unlocked at the moment of connection.
Some photos are missing after import — check whether they’re in a different album on the iPhone rather than the main Camera Roll, since some import flows focus on the main camera roll and may not automatically include every custom album.
Transfer is very slow — Live Photos and videos are meaningfully larger files than a still photo despite looking similar in a thumbnail grid, and a library with many of either will genuinely take longer to transfer than the same number of plain still photos.
- ✓Use a USB cable for transferring a large number of photos at once
- ✓Use AirDrop for a quick handful of photos to a Mac specifically
- ✓Confirm the cable actually supports data transfer, not just charging
- ✓Unlock the iPhone fully before expecting the Trust This Computer prompt
- ✓Check custom albums, not just Camera Roll, if photos seem to be missing after import
- ✕Assuming a charging cable also supports data transfer without checking
- ✕Expecting AirDrop to work for sending photos to a Windows computer
- ✕Relying on email or messaging apps for transferring more than a couple of photos
- ✕Assuming iCloud Photos sync is instant for a large existing photo library
- ✕Deleting photos from the iPhone before confirming the import actually completed successfully
Frequently asked questions
What’s the fastest way to transfer photos from an iPhone to a computer?
A USB cable is fastest and most reliable for a large number of photos, working entirely offline with no upload wait.
Can I use AirDrop to send photos from an iPhone to a Windows computer?
No. AirDrop only works between Apple devices — it’s not available for transferring to a Windows computer.
Why isn’t my iPhone showing up when I connect it to my computer?
Check that the cable actually supports data transfer, not just charging, and confirm the iPhone is unlocked with Trust This Computer accepted.
Do photos get deleted from my iPhone after transferring them to a computer?
No, not by default. Originals remain on the iPhone after import unless you specifically choose to delete them afterward.
How do I transfer photos from iPhone to a Windows computer?
Connect via USB cable and use Windows’ built-in Photos app, or browse to the iPhone’s DCIM folder in File Explorer to copy files directly.
Why are some of my photos missing after importing from my iPhone?
They may be in a different album rather than the main Camera Roll — check other albums on the iPhone specifically.
- →Send photos wirelessly between Apple devices: how to AirDrop
- →Free up space once photos are backed up: how to free up storage on iPhone
- →Protect your photos with a full backup: how to back up an iPhone
- →Capture a screen instead of a camera photo: how to screenshot on Mac