
To block spam emails in Outlook, select the message, right-click, choose Junk, then Block Sender or, better, Report as Junk (or Report as Phishing for anything attempting to steal information). Reporting does more than blocking alone — it also helps Outlook’s spam filter recognize similar messages in the future, not just from that one sender.
The layers that actually stop spam
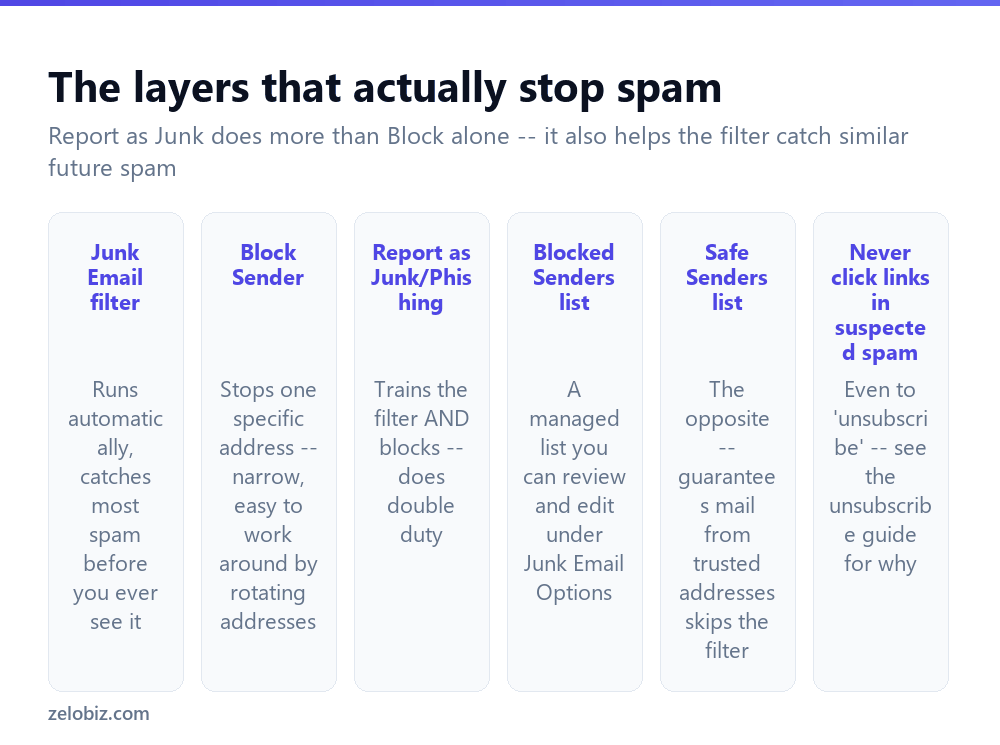
The Junk Email filter runs automatically in the background, analyzing incoming mail and routing likely spam straight to the Junk Email folder before it ever reaches your inbox. This catches the large majority of spam without any manual action needed.
Block Sender stops one specific email address going forward. It’s narrow by design — effective against a persistent individual sender, less effective against spam operations that rotate through many different sending addresses, where blocking one does nothing to stop the next.
Report as Junk (or Report as Phishing for messages attempting to steal credentials or personal information) blocks the sender and also feeds that message to Outlook’s spam-detection system, helping it recognize similar future messages — including from senders you haven’t personally blocked yet.
Reporting rather than just blocking is generally the better default action, since it improves the automatic filter going forward rather than only handling the one message in front of you.
Blocking and reporting a spam sender
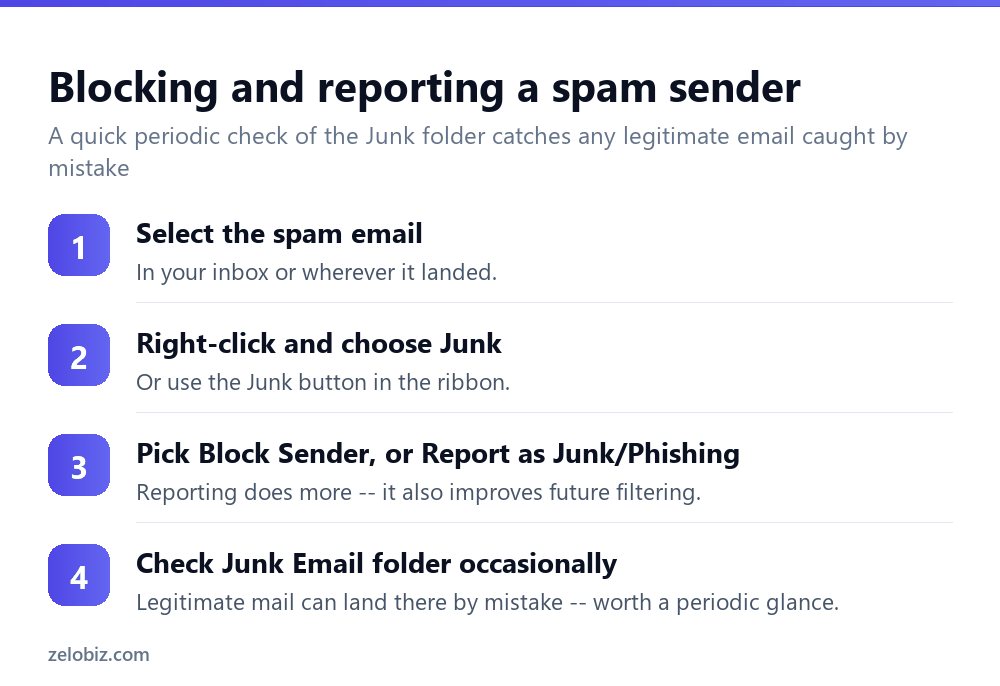
Select the spam message, right-click it, and look for the Junk submenu — or use the Junk button directly in the ribbon if using the message is open.
Choose Block Sender to stop just that address, or Report as Junk / Report as Phishing to both block and help train the filter. For anything that looks like it’s trying to get you to click a link or provide login details under false pretenses, Report as Phishing specifically is the right choice over plain Junk, since it’s treated differently by Microsoft’s broader security systems.
Worth a periodic glance at the Junk Email folder itself — automatic filters occasionally misclassify legitimate mail. Anything caught by mistake should be marked Not Junk, which both restores it to the inbox and helps the filter avoid the same mistake for that sender again.
Managing your Blocked and Safe Senders lists
File › Options › Trust Center › Trust Center Settings › Junk E-mail opens the full Junk Email Options dialog, including tabs for Blocked Senders and Safe Senders — both fully editable lists rather than one-off actions.
The same dialog includes a protection level setting — No Automatic Filtering, Low, High, or Safe Lists Only. Raising it catches more spam but increases the chance of a legitimate message being misclassified; most people do fine on the default Low or High setting without needing Safe Lists Only, which is quite restrictive.
Adding a trusted contact or domain to Safe Senders guarantees their mail always reaches your inbox regardless of the filter’s usual judgment — useful for a sender whose legitimate mail keeps getting misclassified as junk for some reason.
A worked example: an inbox suddenly flooded with spam
Say your inbox has recently started receiving a noticeable surge of spam — several messages a day from varying addresses, all pushing similar products or scams, where previously you got almost none.
Start by reporting, not just deleting, a handful of representative examples — Report as Junk for generic marketing-style spam, Report as Phishing for anything asking you to click a link, verify an account, or provide information. Each report helps the filter learn the pattern, not just remove that one message.
Next, check File › Options › Trust Center › Trust Center Settings › Junk E-mail and consider raising the protection level from Low to High if it’s currently set low — a sudden surge is a reasonable trigger to tighten filtering, even knowing it slightly raises the chance of a legitimate email being misclassified.
Finally, think about where the surge might have originated — a recent account signup, a public form submission, or a data breach at a company you use are all common triggers for a sudden spike in a previously quiet inbox. This doesn’t change what to do in Outlook itself, but it’s worth knowing if the same address needs to be treated more cautiously going forward, or if a password change at the source company might be warranted if it appears to stem from a breach.
Understanding what triggers the automatic filter
Outlook’s Junk Email filter weighs several signals when deciding whether to route a message to Junk automatically, and understanding roughly what they are helps explain both why some spam still gets through and why some legitimate mail occasionally doesn’t.
Sender reputation — addresses and domains with a history of being reported as spam by many users across Microsoft’s broader network are more likely to be filtered automatically, even before you’ve personally interacted with that sender.
Content patterns — certain phrasing, excessive links, urgency-driven language (“act now,” “your account will be suspended”), and other characteristic spam and phishing patterns contribute to the automatic scoring, independent of who specifically sent the message.
Your own past actions — consistently marking similar messages as Junk, or conversely marking a sender’s mail as Not Junk, teaches the filter your specific preferences over time, on top of the broader signals shared across all Outlook users.
None of this is something you configure directly — it runs automatically — but understanding it explains why Report as Junk is more valuable than Block Sender alone: reporting contributes to those broader signals, while blocking only affects your own inbox’s handling of that one specific address.
Spam that specifically impersonates people or companies you know
A particular category worth flagging separately: spam or phishing that spoofs a familiar name or company — an email that looks like it’s from your bank, a delivery company, or even a colleague, but isn’t actually from them at all.
The display name shown in an email is trivially easy to fake and proves nothing on its own. Before trusting a message because of who it appears to be from, check the actual underlying email address (usually visible by hovering over or clicking the sender’s name), not just the display name — a message claiming to be from “Your Bank” but sent from an address that has nothing to do with your bank’s actual domain is a clear sign of impersonation, regardless of how convincing the display name and formatting look.
Report these as Phishing specifically rather than generic Junk, since impersonation attempts are exactly the category that reporting mechanism is designed to help address beyond just your own inbox.
When spam keeps coming despite blocking
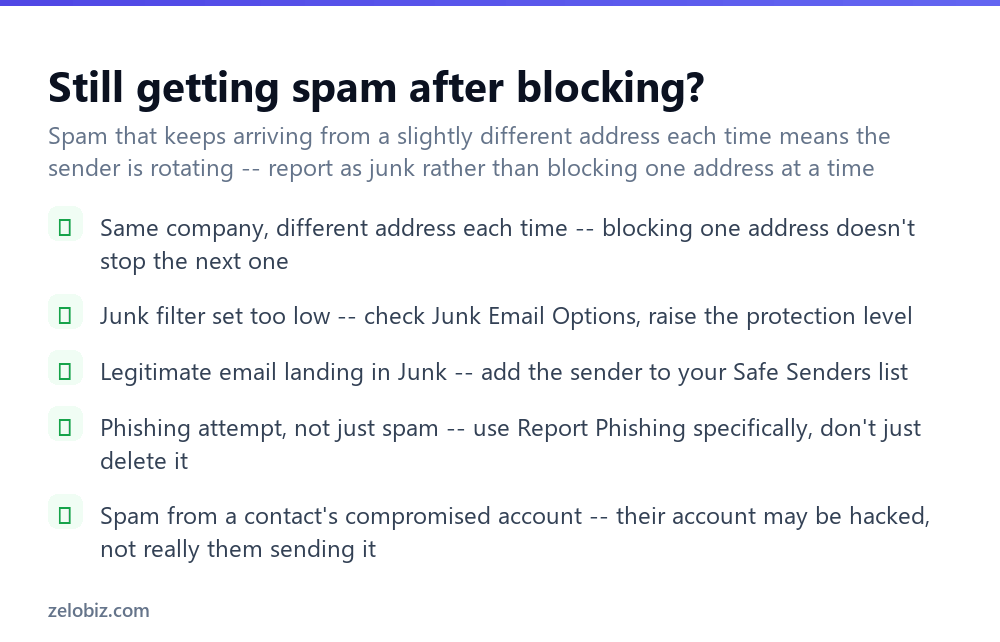
Same company, different address each time — this is a rotating-sender spam operation, and blocking individual addresses one at a time will never keep up. Report as Junk repeatedly instead, which trains the broader filter to recognize the pattern rather than just one address.
Legitimate email landing in Junk — add that specific sender to your Safe Senders list rather than repeatedly marking it Not Junk each time it happens.
Something that looks like phishing, not just generic spam — use Report as Phishing specifically rather than plain Junk. It routes differently and contributes to broader security systems beyond your own inbox’s filtering.
Spam appearing to come from someone you actually know — this often means their account has been compromised, not that they’re genuinely sending you spam. Consider letting them know through a different channel (a text or phone call, not replying to the suspicious email) that their account may be compromised.
- ✓Use Report as Junk or Phishing rather than just Block for most spam
- ✓Check the Junk folder occasionally for legitimate mail caught by mistake
- ✓Add a trusted sender to Safe Senders rather than repeatedly marking Not Junk
- ✓Use Report as Phishing specifically for anything trying to steal information
- ✓Notify a contact through a different channel if their account seems compromised
- ✕Blocking individual addresses one at a time against a rotating-address spam operation
- ✕Clicking links in suspected spam, even ones labeled unsubscribe
- ✕Ignoring the Junk folder entirely and missing legitimate mail caught by accident
- ✕Treating an obvious phishing attempt the same as generic marketing spam
- ✕Replying directly to a suspicious email that appears to come from a known contact
Frequently asked questions
How do I block a spam sender in Outlook?
Right-click the email, choose Junk, then Block Sender, or better, Report as Junk, which also helps train the spam filter for future messages.
What’s the difference between Block Sender and Report as Junk?
Block Sender stops just that one address. Report as Junk does that and also feeds the message to Outlook’s spam filter to improve future detection.
Why do I keep getting spam after blocking the sender?
The spammer may be rotating through different sending addresses. Report as Junk repeatedly rather than blocking addresses one at a time.
Why is a legitimate email landing in my Junk folder?
Add that sender to your Safe Senders list under File, Options, Trust Center, Junk E-mail, rather than just marking it Not Junk each time.
What should I do if spam looks like it’s trying to steal my information?
Use Report as Phishing specifically instead of plain Report as Junk — it’s treated differently by broader security systems.
Why am I getting spam from someone I actually know?
Their email account may have been compromised. Let them know through a different channel, not by replying to the suspicious email itself.
- →Handle marketing email the right way: how to unsubscribe from emails
- →Automate what happens to what gets through: how to create a rule in Outlook
- →Keep a spam-filtered inbox tidy: how to archive emails in Outlook
- →Fix a message sent to the wrong person: how to recall an email in Outlook